Patient Chart
Patient Profile
Add a header to begin generating the table of contents
Other Sections
Add a header to begin generating the table of contents
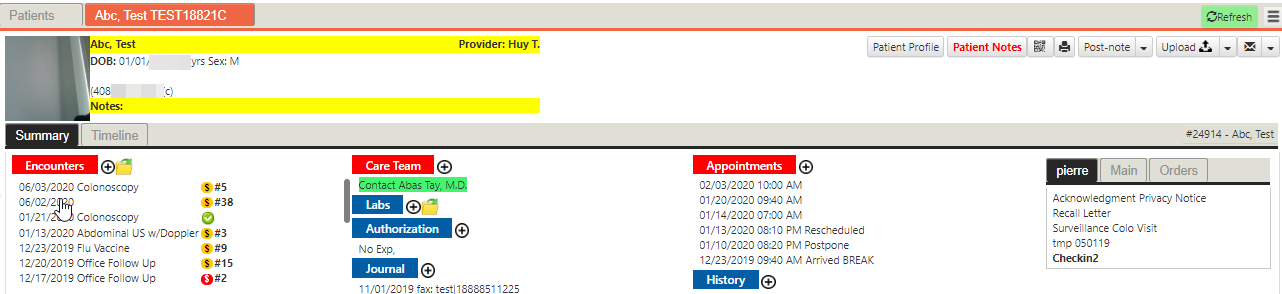
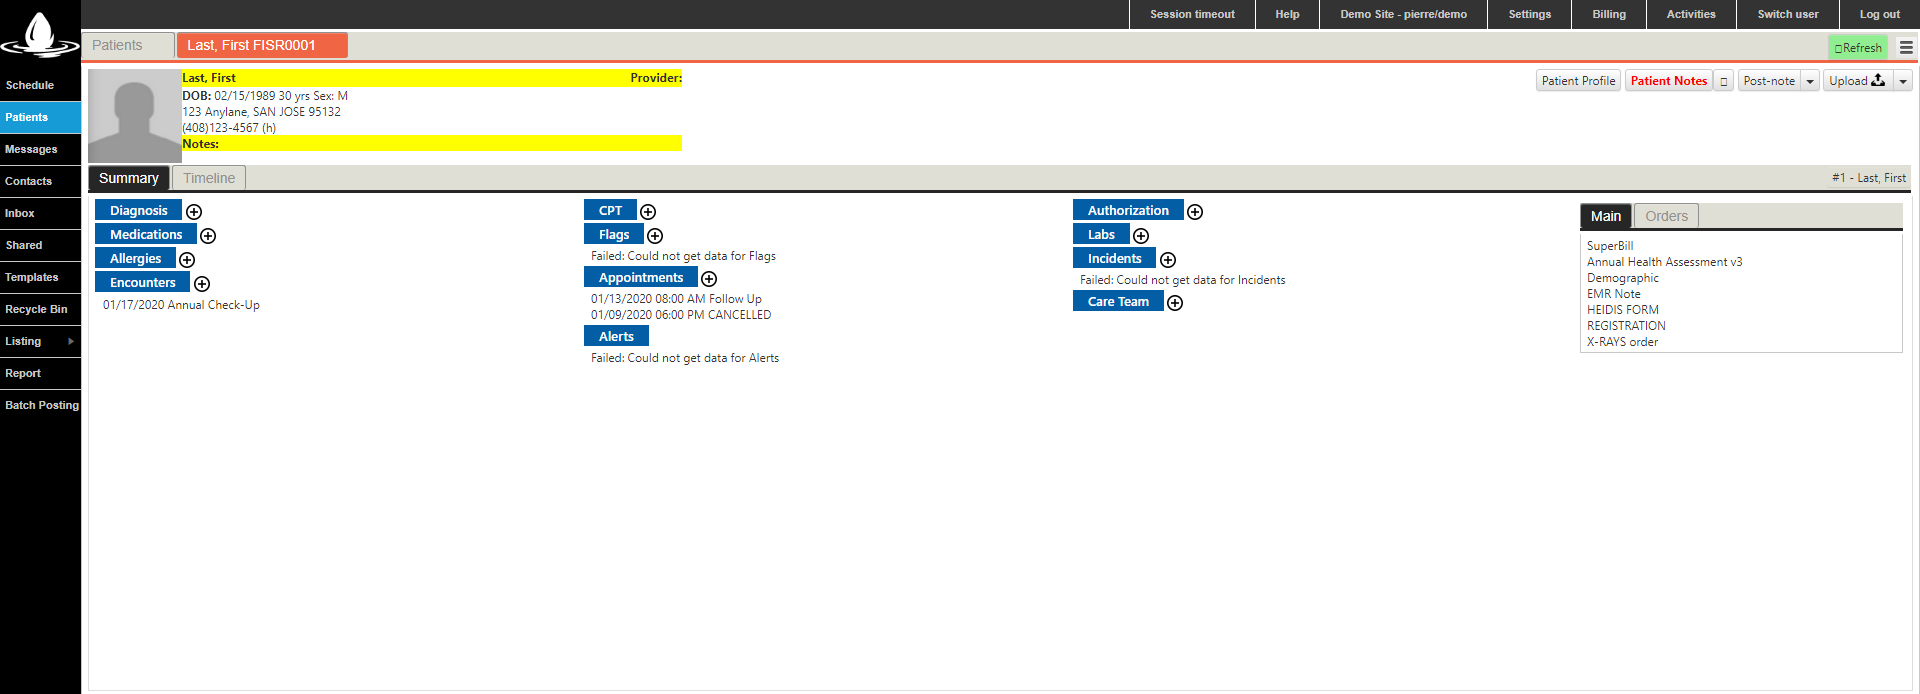
The Patient Chart is a summary screen of all things important to the specific patient. From this screen, users can lookup their profile to edit any contact information, insurance, identifying information, etc. They can also enter in any new encounters, diagnosis, vitals, or even fill out a new Rx order by the simple click of a button.
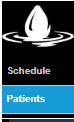
Patient Tab Location
Click on the Patients tab from the left side panel to search all patients within the clinic

Search:
- enter last name, first name with partial text to search
- enter date of birth to search by that *Most accurate search
- enter chart#, either a full chart ALT111967 or just the number portion 111967
Open/Edit Existing Patient Profile
- Enter the patient’s name, date-of-birth or account number in the search bar > click Search Patient (see reference) > double-click the correct patient

- Click the Clear icon to delete info and restart
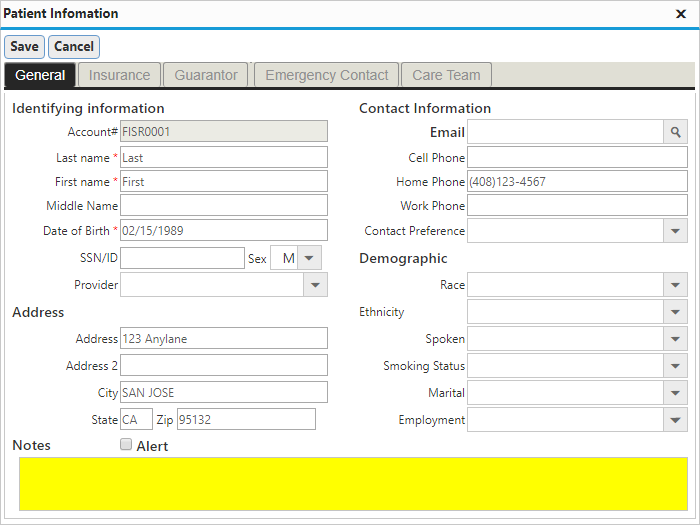
- Click Patient Profile icon (see picture)
- Or select an appointment > click Patient Info
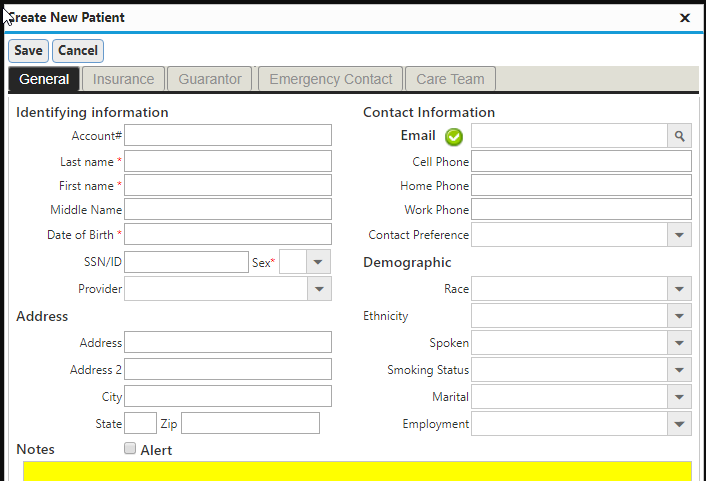
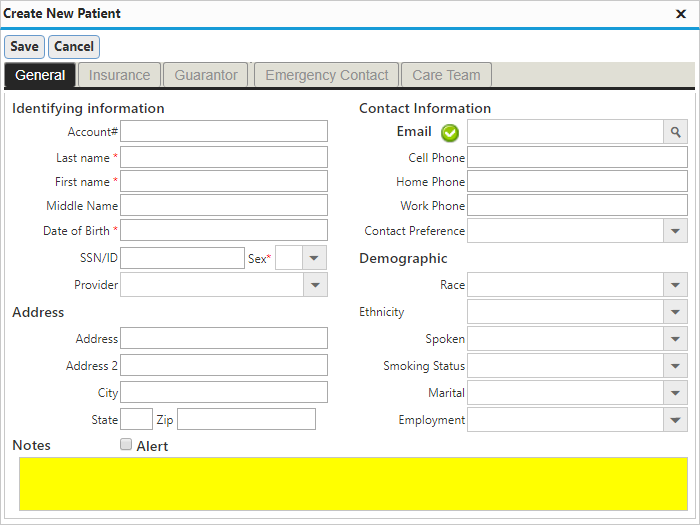
Create New Patient Profile
- Click New Patient icon (see picture)
- Enter the patient’s demographic information (required fields marked with an asterisk) > click save icon
Delete/Merge Patient
Sometimes staff creates another chart by accident and you want to merge them together
- Select patient > click delete icon > yes or no
- Select delete patient icon drop down
- Find correct patient in search bar > double click
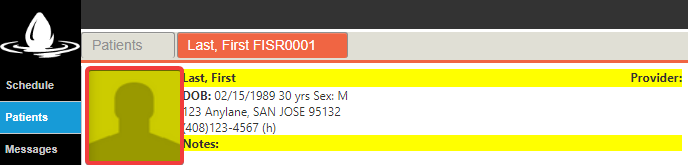
(Optional/Advance)Take Patient Picture
- Setup a compatible webcam (see CloudEMR – Hardware & Software Requirements)
- Click the Patients tab from the left side panel
- Enter the patient’s name, date-of-birth or account number in the search bar > click Search Patient (see reference) > double-click the correct patient
- Click the picture in the upper left-hand corner (see picture)
- Click Capture > Save and Close
Patient Summary (Chart)
Add a header to begin generating the table of contents
Open Patient Summary
- Enter the patient’s name, date-of-birth or account number > click Search Patient (see reference) > double-click the correct patient
- Or right-click an appointment > click Open Chart (see reference)
- Or select an appointment > click Patient Chart (see reference)
“Add to” Patient Summary
- Open a Patient Summary (see picture)
- Click + next to the correct summary section (e.g. Encounter, Diagnosis, CPT, etc.) and fill out the new entry
- Or click the summary section title (e.g. Encounter, Diagnosis, CPT, etc.)
- Click + and fill out the new entry
- Click + and fill out the new entry
- Or click Timeline
- Click the correct timeline tab (e.g. Encounter, Diagnosis, CPT, etc.) > click + and fill out the new entry

- Click the correct timeline tab (e.g. Encounter, Diagnosis, CPT, etc.) > click + and fill out the new entry
- Or click the summary section title (e.g. Encounter, Diagnosis, CPT, etc.)
Delete From Patient Summary
- Click the entry to be deleted > click the Trash Can Delete button
- Or click the summary section title (e.g. Encounter, Diagnosis, CPT, etc.)
- Select the entry to be deleted > click the Delete button
- Or click Timeline
- Click the correct timeline tab (e.g. Encounter, Diagnosis, CPT, etc.) > select the entry to be deleted > click the Delete button
- Or click the summary section title (e.g. Encounter, Diagnosis, CPT, etc.)
Print Forms
- Click the summary section (e.g. Encounter, Diagnosis, CPT, etc.) that corresponds to the desired form
-
- Or click Timeline
- Click the correct timeline tab (e.g. Encounter, Diagnosis, CPT, etc.)
- Or click Timeline
- Find Form > select the desired form (see configuration)
- If necessary, Fill the form > click the Printer button
- Click Print in the browsers print window
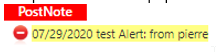
Add Post Notes
- Find the Post-Note drop-down > select the desired option (see configuration) > enter a custom note > press enter

- To create new post note
- Hover over alert and fill the black box with desired writing

- Hover over alert and fill the black box with desired writing
- The post-note should populate on the patient summary
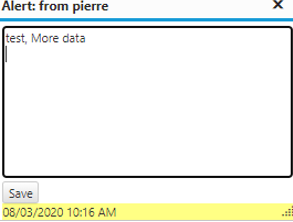
Open/Edit Post Note
- Click on the post note entry
- Edit the post note > click save > results will automatically populate

Delete Post Note
- Find the PostNote section > click – next to the entry to be deleted
Print Patient Summary
- Click the Printer button

- Click Print in the browsers print window
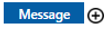
Send Message
- Open a Patient Summary
- Click the Message button
- Or select a pre-configured quick message from the drop-down
- Or select a pre-configured quick message from the drop-down
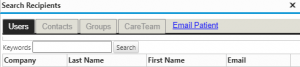
- Click on TO Hyperlink , which will show a “Search Recipients” window
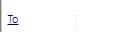
- Browse through different tabs (Users, Contacts, Groups, CareTeam) > OK
- Compose a message
- Click Send
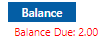
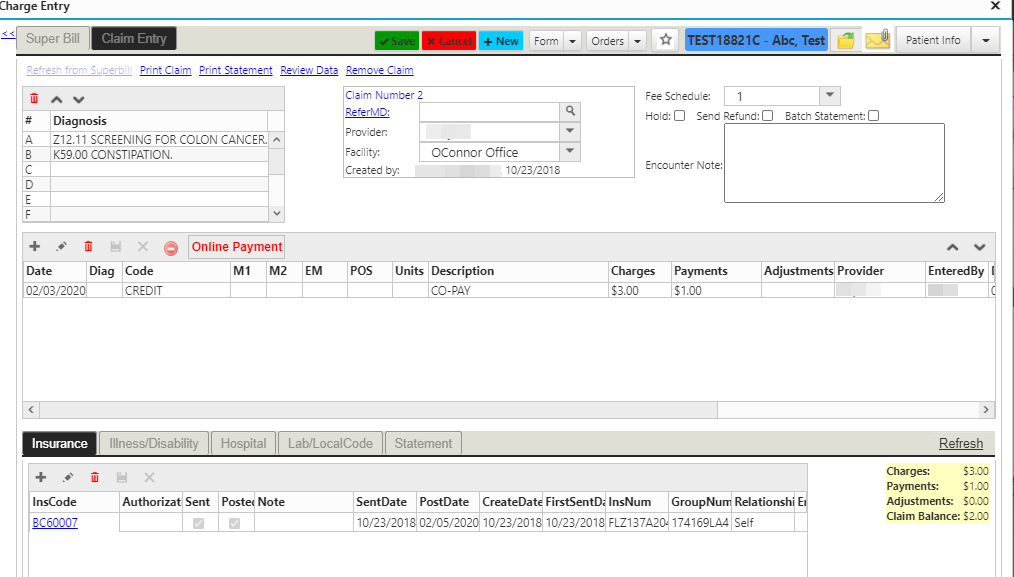
Balance
For any due or past due balance, it will show underneath the Balance icon on the patient’s summary chart. Users can also see the balance on the quick preview of a patient in the Schedule tab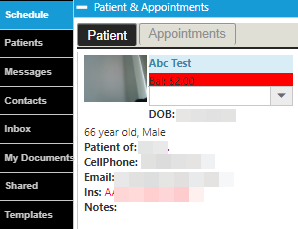
- Click the Balance Icon on a patient’s summary screen
- A separate Timeline window will appear which will list all the different claims for the patient > click the claim that needs to be paid ONCE >
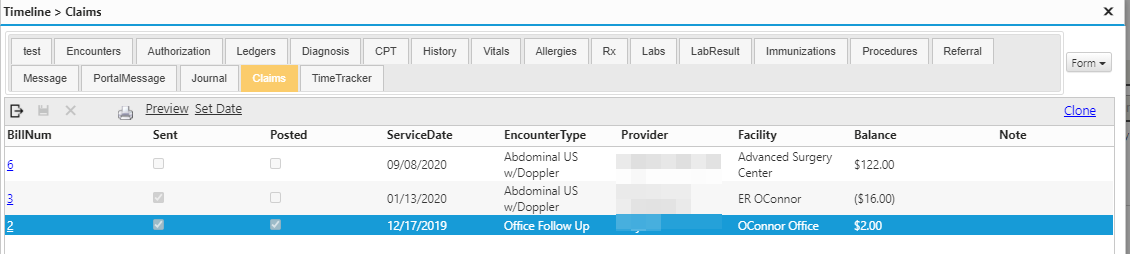
- Double check the patient is correct > fill out any necessary information > click Save when ready
Patient Notes (Documents)
Add a header to begin generating the table of contents
Click Patient Notes to pull up new window for inbound documents related to the patient
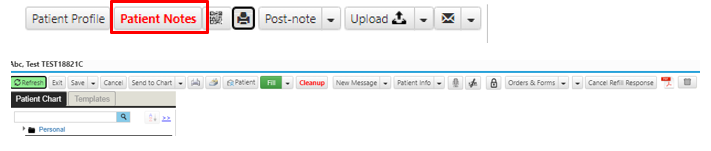
Chart Note Toolbar Functionalities
- Refresh icon: to update the content of the display
- Exit icon: to exit current screen and bring you back to Patient Summary screen
- Save icon: saves selected document
- Save dropdown menu: provides different options (Save on hold, Download Chart Notes, Rename Documents, Export Documents, Merge Documents, etc.)
- Print icon: will print current document
- Fax icon: will fax current document
- Patient envelope icon : Similar to messaging, users can message a document straight from the inbox directly to the patient
- New Message icon: will allow users to message directly from this screen to staff members
- Patient Info icon: can bring up the patient profile window from the summary screen for reference or to edit
- Can also edit Timeline, Superbill, Encounters, etc.
- Voice recorder icon: will allow users to record voice dictation to be inserted into document
- Click icon > start recording > stop when finished > insert into document
- Lock icon: users can lock document and set password
- Create password to lock/unlock document
- Document will automatically lock after 60 days
- Orders and Forms icon: Users can go straight into filling out prescription for patient (Cloud ERX, eLab Order, etc.)
- Stamp icon: Choose from populated options or create new from Summary screen
- See personalization section for reference
- PDF icon: to open new link in browser
- Trash can icon: to delete current document
View Patient Notes
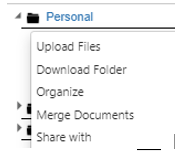
Folder operations: Click the folder icon to perform functions
- Arrow icon: expand the list of notes
- Folder icon: browse different actions (Upload files, Download Folder, Organize, etc. )
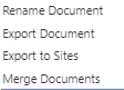
- 3 vertical dots icon : to browse different actions (Rename Document, Export Document, Export to Sites, delete document, etc.)

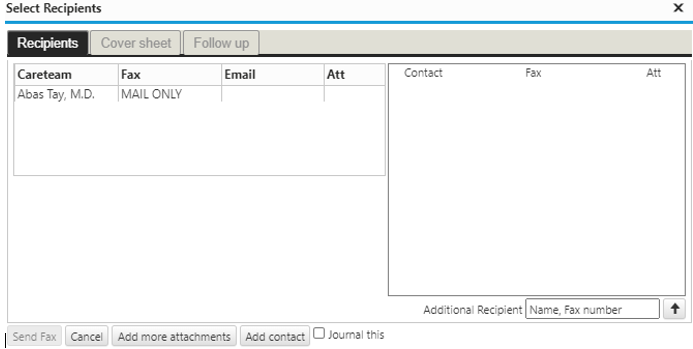
Fax a Document
- Select the Fax icon > choose the correct recipients from the Select Recipients window > fill out desired information in the Recipients, Cover Sheet, Follow Up tabs
Upload Patient Notes
- Open a Patient Summary
- Click Upload
- Select the correct file to upload > select a new name from the drop-down
- Or enter a new file name
- Click Upload
Reference Guide
Add a header to begin generating the table of contents
Patient Summary
- Patients: opens patient lookup (see reference)
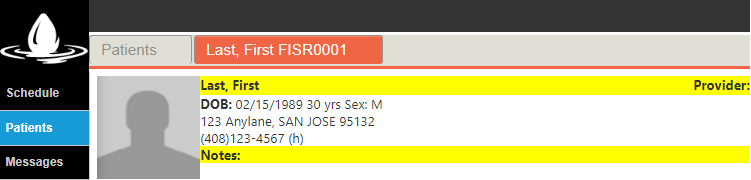
- Patient Tab: displays patients last name, first name and account number
- Patient Photo: displays the patients photo
- Last, First, Provider, etc: displays patient’s demographics

- Patient Profile: opens patient information window
- Patient Notes: opens patient notes
- Print: prints current patient’s summary
- Post-Note: adds post-notes to current patient’s summary
- Upload: uploads files to current patient’s chart
- Summary: opens current patient’s summary
- Timeline: opens current patient’s timeline
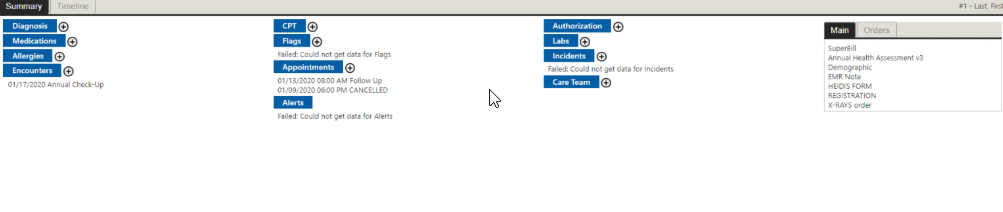
- Diagnosis, CPT, Authorization, etc: summary sections (see configuration)
- Main: displays frequently used (see configuration) templates
- Order Tabs: displays frequently used (see configuration) orders (i.e. Labs, eRx)
Patient Timeline

- Summary: opens current patient’s summary
- Timeline: opens current patient’s timeline
- Allergies, Authorization, CPT, etc: timeline tabs (see configuration)
Patient Timeline Toolbar
![]()
- Add: creates a new entry
- Edit: edits the selected entry
- Save: saves current entries, selections and changes
- Cancel: cancels current selections
- Delete: deletes the selected entry
- Search: searches the current tab’s entries
- Print: prints the current tab’s data
Patient Summary Toolbar
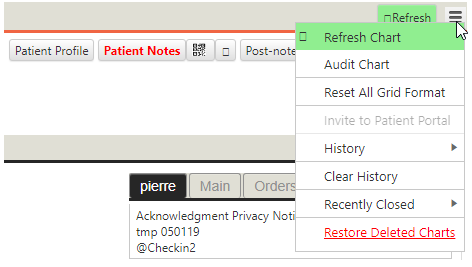
- Refresh: refreshes the patient summary with the most up-to-date data
- Audit Chart: lists what changes users have made to that patient’s chart
- History: lists the the most recent changes to that patient’s chart
- Clear History: deletes that chart’s history
- Recently Closed: lists recently closed charts
- Recently Deleted: restores recently deleted charts
Patient Notes Toolbar
![]()
- Refresh: refreshes patient notes with the most up-to-date data
- Exit: closes the patient notes window
- Save: saves changes made to the current patient note
- Save, On Hold: creates a task with the current note as an attachment to remind the user it is unfinished before saving changes made to the patient note
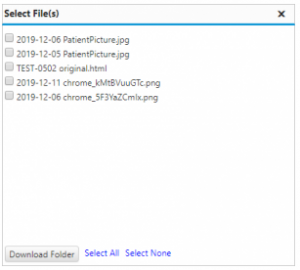
- Download Chart Notes: opens the “Select File(s)” window to download patient notes
- Rename Document: renames the current patient note
- Export Document: downloads the current patient note
- Merge Document: opens the “Merge Documents” window to combine multiple chart notes
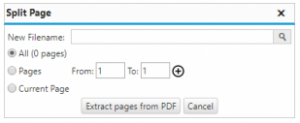
- Extract Pages from PDF: splits PDF files into multiple patient notes
-
- Delete Document: deletes the current note
- Comment: opens the “Document Notes” window to comment on the current patient note
- Export to Sites: exports the current patient note to other facilities
- Share with: exports the current patient note to other solutions (e.g. Patient Portal, Care Team Portal)
- Cancel: cancel changes made to the current note
- Send to Chart: opens the “Patient Lookup” window to select to which chart to route, link or copy the current patient note
- Inbox: moves the current patient note to the “Inbox”
- My Documents: moves the current patient note to the selected destination in “My Documents”
- Shared: moves the current patient note to “Shared”
- Print: prints the current patient note
- Fax: faxes the current patient note (see eFax)
- Patient (Email): emails the current patient note to the patient
- Fill: starts filling the current patient note’s macros
- New Message: opens the “Message” window with the current patient in the “Relates To” field
- Drop-down: select from pre-configured quick messages
- Patient Info: opens the “Patient Information” window
- Drop-down: select other sections of the patient summary (e.g. Encounters, Diagnosis, CPT, etc.) to open
- Dictate: records audio in the current patient note for transcription
- Sign: prompts for a signature via a compatible ePad device
- Signature: prompts for a password to authorize a pre-configured digital signature
- Order & Forms: opens orders (e.g. eLab Orders, eRx, etc.) and forms
- Stamp: stamps pre-configured images (e.g. Signatures, Logos, etc. ) into the current patient note
- Delete: deletes the current patient note
- Open as PDF: opens the current patient note in a local PDF viewer (e.g. Adobe Acrobat, Google Chrome, etc.)
Message Window
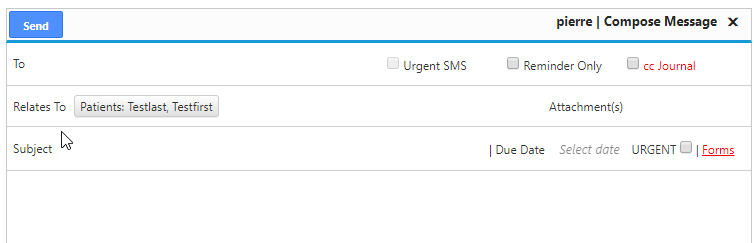
- To: enter to whom the message will be sent
- Relates To: enter to which patient the message relates
- Subject: enter the subject of the message
- Attachments: selects which patient notes to attach to the message
- cc Journal: adds this message to the patient’s Journal
- Forms: selects which forms to attach to the message