Patient Chart
Patient Profile (Demographics)
Add a header to begin generating the table of contents
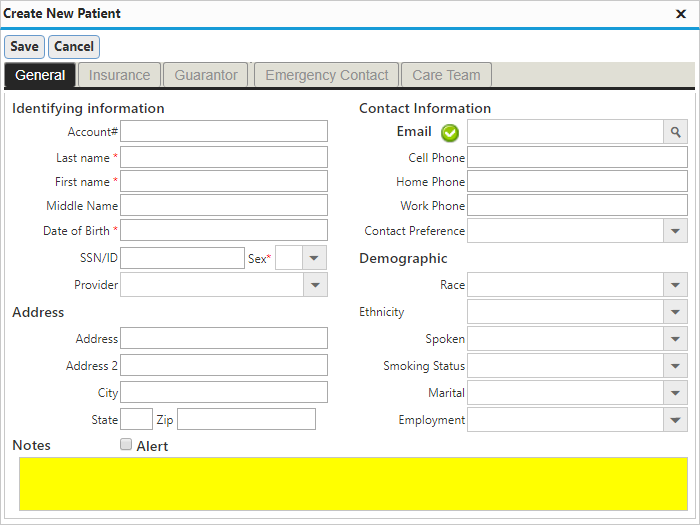
Create New Patient Profile
- Click Patients
- Click New Patient (see picture)
- Enter the patient’s demographic information (required fields marked with an asterisk)
- Click Save
Open / Edit Existing Patient Profile
- Click Patients
- Enter the patient’s name, date-of-birth or account number> click Search Patient (see reference) > double-click the correct patient
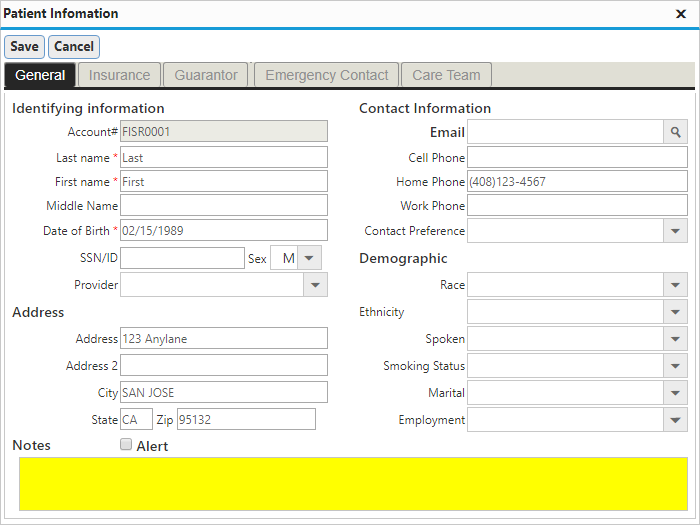
- Click Patient Profile (see picture)
- Or select an appointment > click Patient Info
- Edit view or edit the patient’s information in each of the tabs (General, Insurance, Guarantor, Emergency Contact, Care Team)
- Click Save
Take Patient Picture
- Setup a compatible webcam (see CloudEMR – Hardware & Software Requirements)
- Click Patients
- Enter the patient’s name, date-of-birth or account number > click Search Patient (see reference) > double-click the correct patient
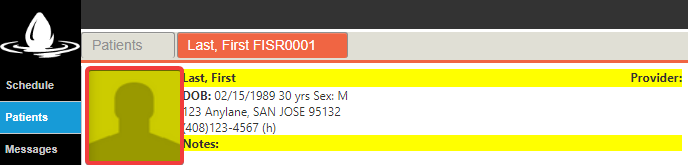
- Click the picture in the upper left-hand corner (see picture)
- Click Capture
- Click Save and Close
Patient Summary (Chart)
Add a header to begin generating the table of contents
Open Patient Summary
- Click Patients
- Enter the patient’s name, date-of-birth or account number > click Search Patient (see reference) > double-click the correct patient
- Or right-click an appointment > click Open Chart (see reference)
- Or select an appointment > click Patient Chart (see reference)
“Add to” Patient Summary
- Open a Patient Summary (see picture)
- Click + next to the correct summary section (e.g. Encounter, Diagnosis, CPT, etc.) and fill out the new entry
- Or click the summary section title (e.g. Encounter, Diagnosis, CPT, etc.)
- Click + and fill out the new entry
- Or click Timeline
- Click the correct timeline tab (e.g. Encounter, Diagnosis, CPT, etc.) > click + and fill out the new entry
- Or click the summary section title (e.g. Encounter, Diagnosis, CPT, etc.)
“Delete from” Patient Summary
- Open a Patient Summary (see picture)
- Click the entry to be deleted > click the Delete button
- Or click the summary section title (e.g. Encounter, Diagnosis, CPT, etc.)
- Select the entry to be deleted > click the Delete button
- Or click Timeline
- Click the correct timeline tab (e.g. Encounter, Diagnosis, CPT, etc.) > select the entry to be deleted > click the Delete button
- Or click the summary section title (e.g. Encounter, Diagnosis, CPT, etc.)
Print Forms
- Open a Patient Summary
- Click the summary section (e.g. Encounter, Diagnosis, CPT, etc.) that corresponds to the desired form
-
- Or click Timeline
- Click the correct timeline tab (e.g. Encounter, Diagnosis, CPT, etc.)
- Or click Timeline
- Find Form > select the desired form (see configuration)
- If necessary, Fill the form > click the Printer button
- Click Print in the browsers print window
Add “PostNote”
- Open a Patient Summary
- Find the PostNote drop-down > select the desired option (see configuration) > enter a custom note
- Press Enter
Delete “PostNote”
- Open a Patient Summary
- Find the PostNote section > click – next to the entry to be deleted
Print Patient Summary
- Open a Patient Summary
- Click the Printer button
- Click Print in the browsers print window
Send Message
- Open a Patient Summary
- Click the Message button
- Or select a pre-configured quick message from the drop-down
- Compose a message
- Click Send
Patient Notes (Documents)
View Patient Notes
- Open a Patient Summary
- Click Patient Notes
- Or right-click an appointment > click Patient Notes (see reference)
Upload Patient Notes
- Open a Patient Summary
- Click Upload
- Select the correct file to upload > select a new name from the drop-down (see reference)
- Or enter a new file name
- Click Upload
Reference Guide
Add a header to begin generating the table of contents
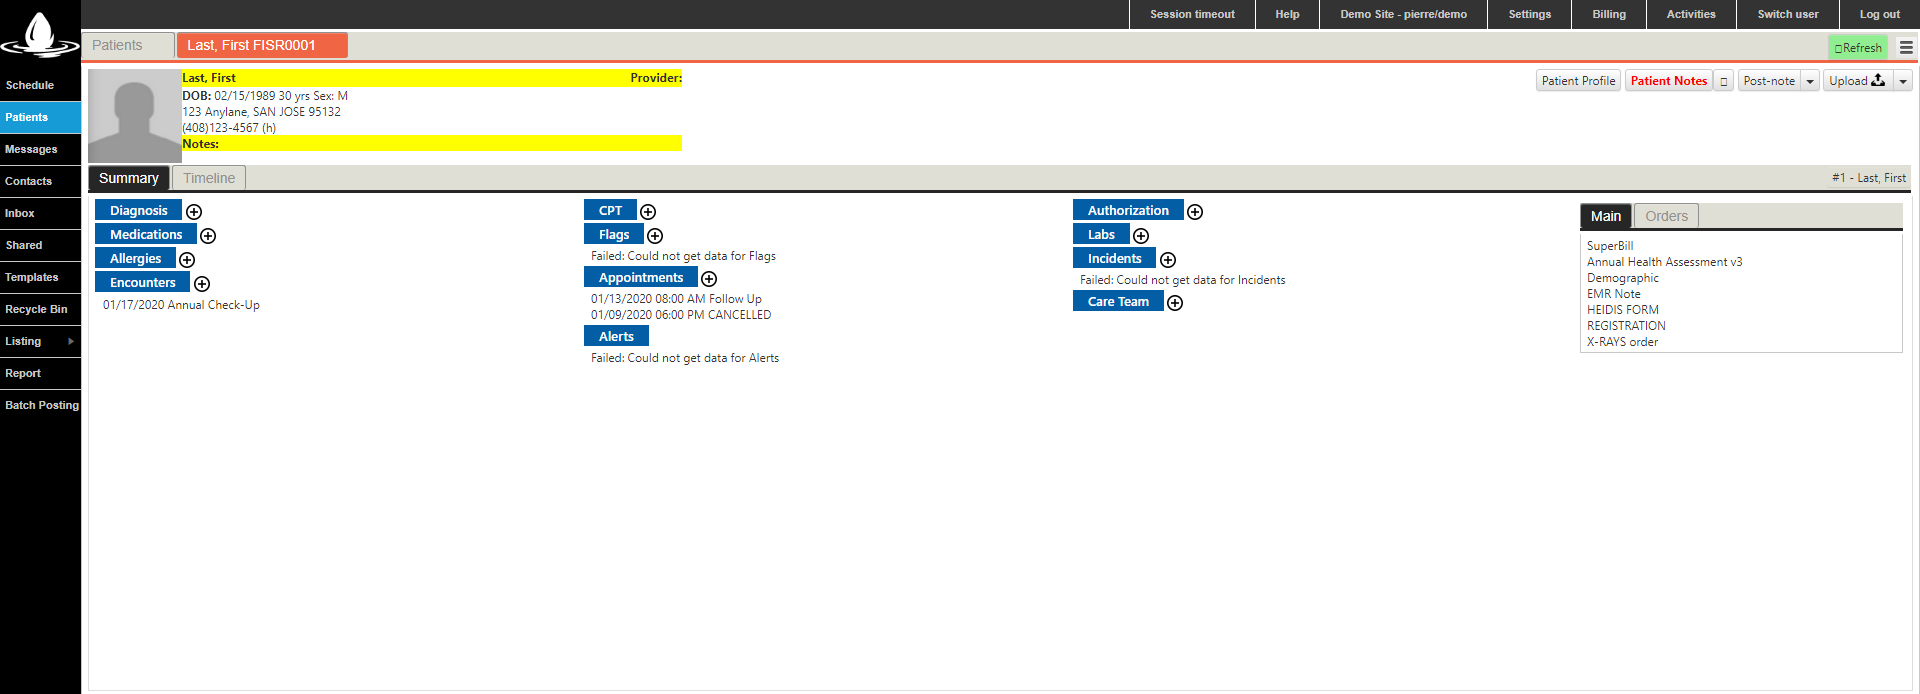
Patient Summary
- Patients: opens patient lookup (see reference)
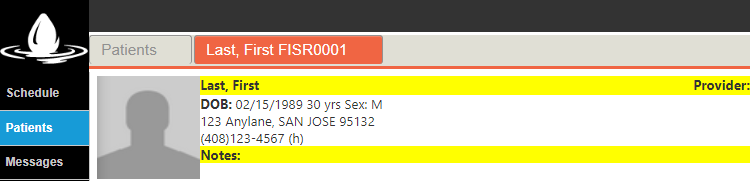
- Patient Tab: displays patients last name, first name and account number
- Patient Photo: displays the patients photo
- Last, First, Provider, etc: displays patient’s demographics

- Patient Profile: opens patient information window
- Patient Notes: opens patient notes
- Print: prints current patient’s summary
- Post-Note: adds post-notes to current patient’s summary
- Upload: uploads files to current patient’s chart
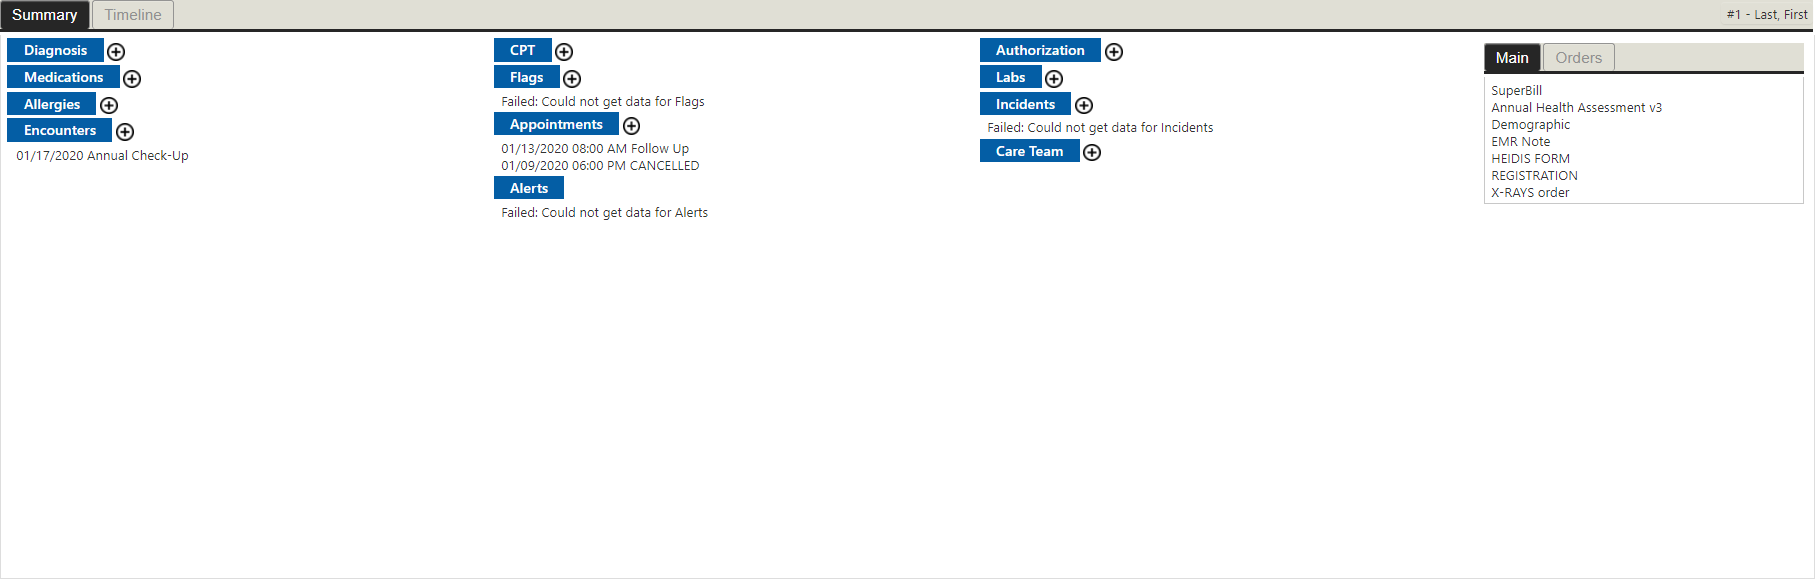
- Summary: opens current patient’s summary
- Timeline: opens current patient’s timeline
- Diagnosis, CPT, Authorization, etc: summary sections (see configuration)
- Main: displays frequently used (see configuration) templates
- Order Tabs: displays frequently used (see configuration) orders (i.e. Labs, eRx)
Patient Timeline
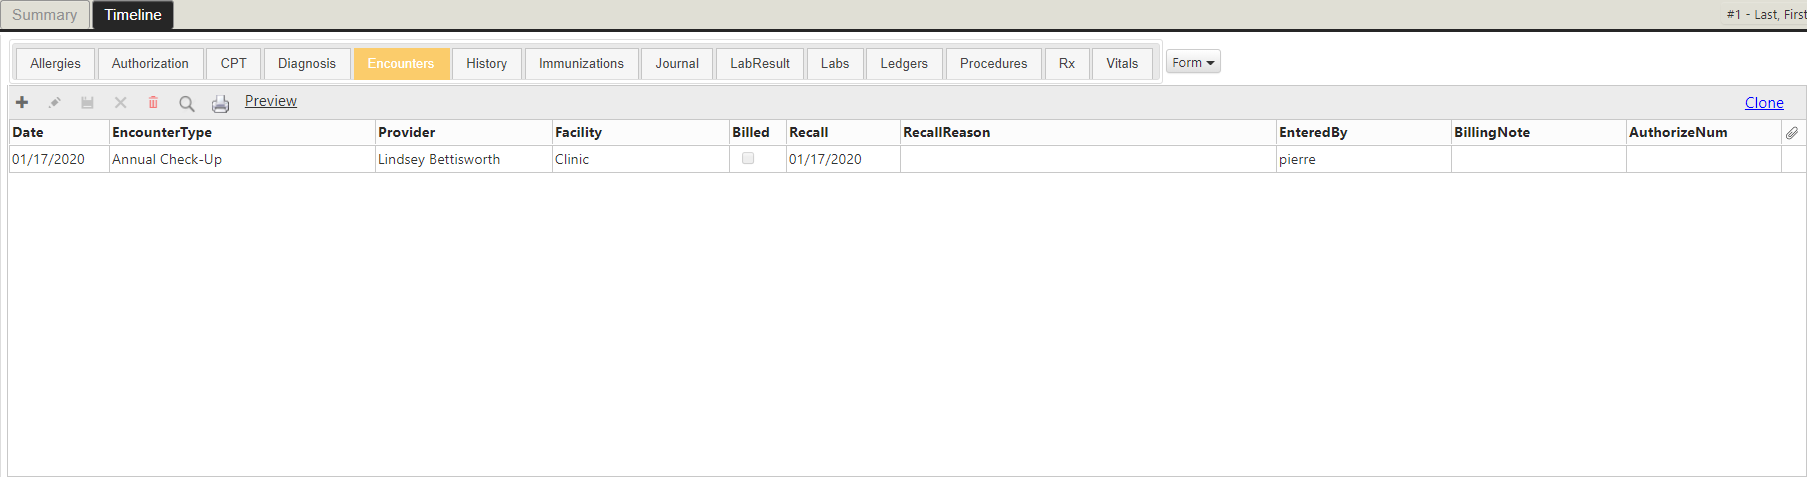
- Summary: opens current patient’s summary
- Timeline: opens current patient’s timeline
- Allergies, Authorization, CPT, etc: timeline tabs (see configuration)
Patient Timeline Toolbar
![]()
- Add: creates a new entry
- Edit: edits the selected entry
- Save: saves current entries, selections and changes
- Cancel: cancels current selections
- Delete: deletes the selected entry
- Search: searches the current tab’s entries
- Print: prints the current tab’s data
Patient Summary Toolbar
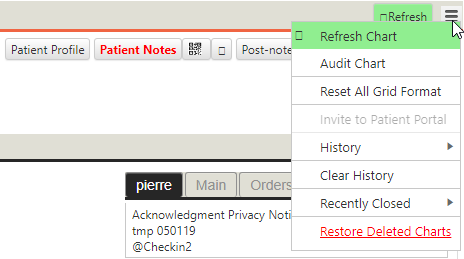
- Refresh: refreshes the patient summary with the most up-to-date data
- Audit Chart: lists what changes users have made to that patient’s chart
- History: lists the the most recent changes to that patient’s chart
- Clear History: deletes that chart’s history
- Recently Closed: lists recently closed charts
- Recently Deleted: restores recently deleted charts
Patient Notes Toolbar*
![]()
- Refresh: refreshes patient notes with the most up-to-date data
- Exit: closes the patient notes window
- Save: saves changes made to the current patient note
- Save, On Hold: creates a task with the current note as an attachment to remind the user it is unfinished before saving changes made to the patient note
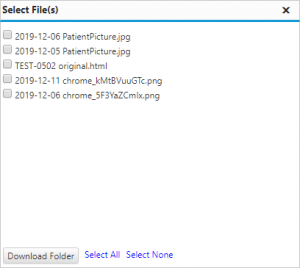
- Download Chart Notes: opens the “Select File(s)” window to download patient notes
- Rename Document: renames the current patient note
- Export Document: downloads the current patient note
- Merge Document: opens the “Merge Documents” window to combine multiple chart notes
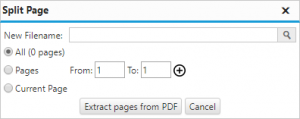
- Extract Pages from PDF: splits PDF files into multiple patient notes
- Delete Document: deletes the current note
- Comment: opens the “Document Notes” window to comment on the current patient note
- Export to Sites: exports the current patient note to other facilities
- Share with: exports the current patient note to other solutions (e.g. Patient Portal, Care Team Portal)
- Cancel: cancel changes made to the current note
- Send to Chart: opens the “Patient Lookup” window to select to which chart to route, link or copy the current patient note
- Inbox: moves the current patient note to the “Inbox”
- My Documents: moves the current patient note to the selected destination in “My Documents”
- Shared: moves the current patient note to “Shared”
- Print: prints the current patient note
- Fax: faxes the current patient note (see eFax)
- Patient (Email): emails the current patient note to the patient
- Fill: starts filling the current patient note’s macros
- New Message: opens the “Message” window with the current patient in the “Relates To” field
- Drop-down: select from pre-configured quick messages
- Patient Info: opens the “Patient Information” window
- Drop-down: select other sections of the patient summary (e.g. Encounters, Diagnosis, CPT, etc.) to open
- Dictate: records audio in the current patient note for transcription
- Sign: prompts for a signature via a compatible ePad device
- Signature: prompts for a password to authorize a pre-configured digital signature
- Order & Forms: opens orders (e.g. eLab Orders, eRx, etc.) and forms
- Stamp: stamps pre-configured images (e.g. Signatures, Logos, etc. ) into the current patient note
- Delete: deletes the current patient note
- Open as PDF: opens the current patient note in a local PDF viewer (e.g. Adobe Acrobat, Google Chrome, etc.)
Message Window
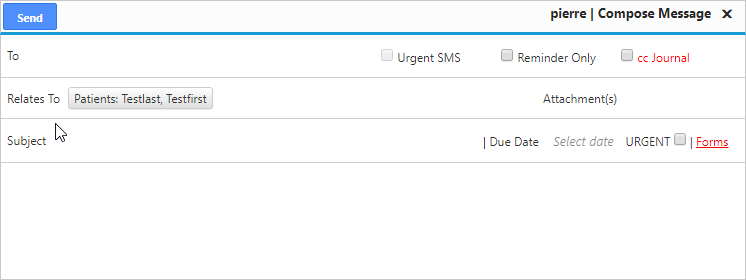
- To: enter to whom the message will be sent
- Relates To: enter to which patient the message relates
- Subject: enter the subject of the message
- Attachments: selects which patient notes to attach to the message
- cc Journal: adds this message to the patient’s Journal
- Forms: selects which forms to attach to the message
Advanced Configuration
Add a header to begin generating the table of contents
Configure Forms Options
- Click Settings > System Configurations > expand Summary > click Templates
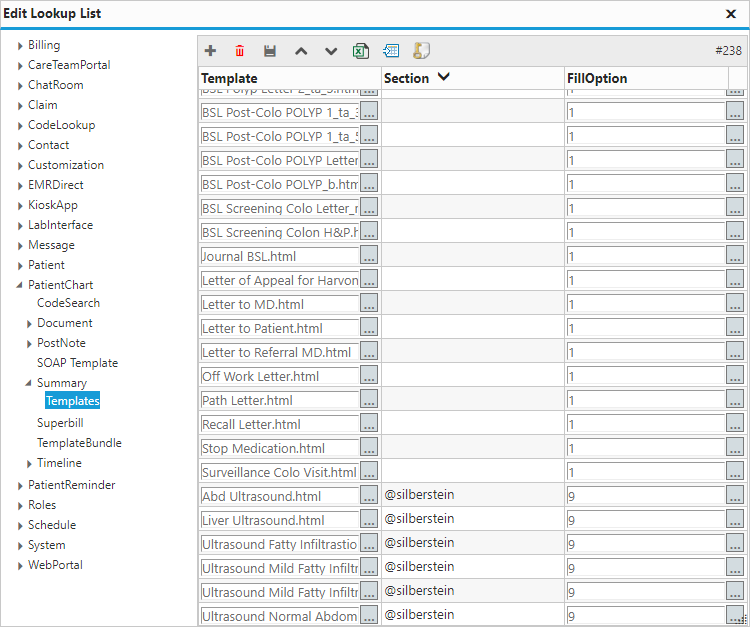
- Template: selects the template to include
- Section: selects where to include the template
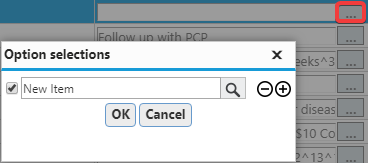
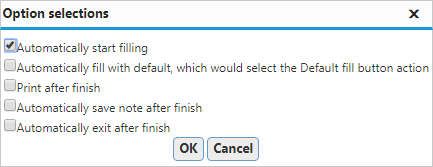
- FillOption: chooses how to fill the template when opened from the selected section (see picture)
Configure Diagnosis Options
- Click Settings > System Configurations > expand Patient > expand ICD9 > click Diagnosis
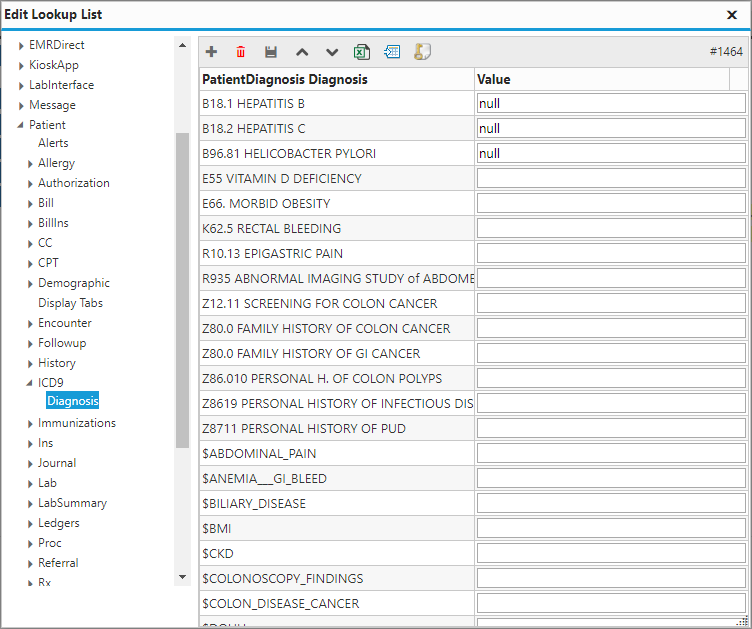
- PatientDiagnosis Diagnosis: enter the diagnosis name
Configure CPT Options
- Click Settings > System Configurations > expand Patient > expand CPT > click Procedure
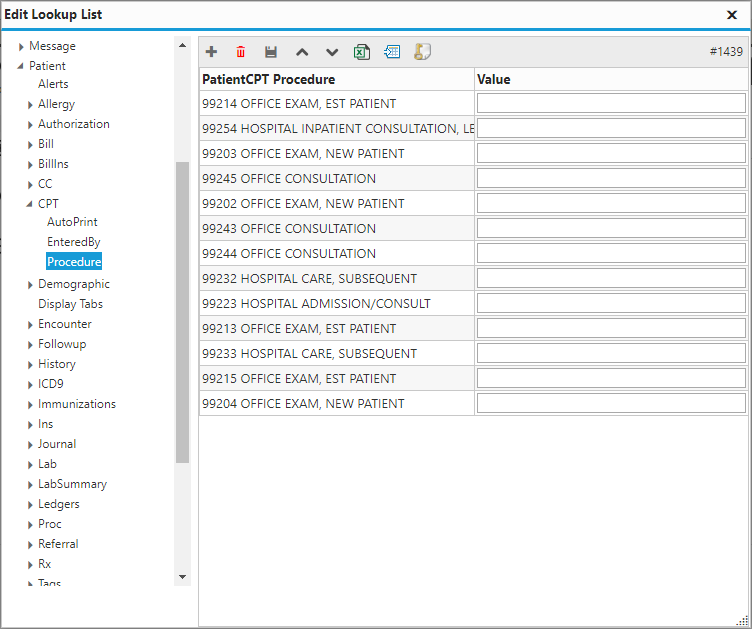
- PatientCPT Procedure: enter the procedure name
Configure Document Folders
- Click Settings > System Configurations > expand PatientChart > expand Document > click Folders
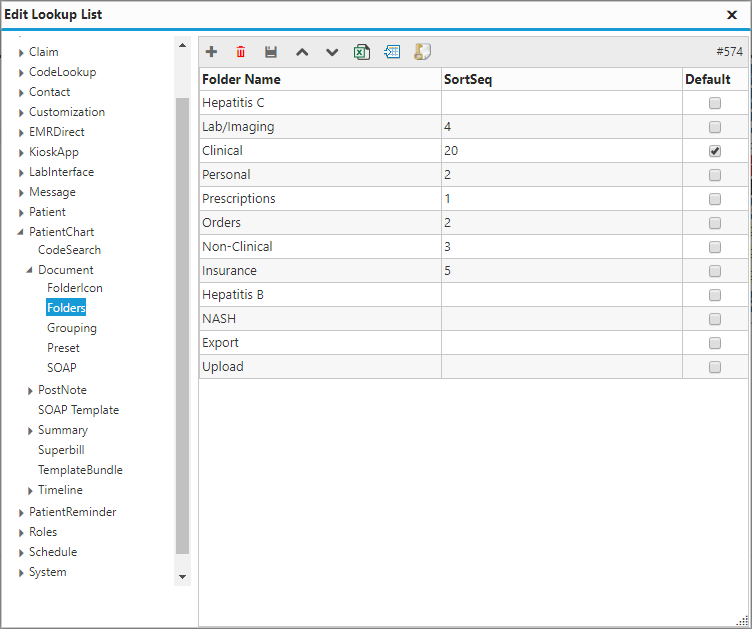
- Folder Name: enter the folder name
- SortSeq: enter the sequence with which to sort the folders
- Default: selects the folder in which to save unsorted documents
Configure Scanned Document Sorting
- Click Settings > System Configurations > expand PatientChart > expand Document > click Preset
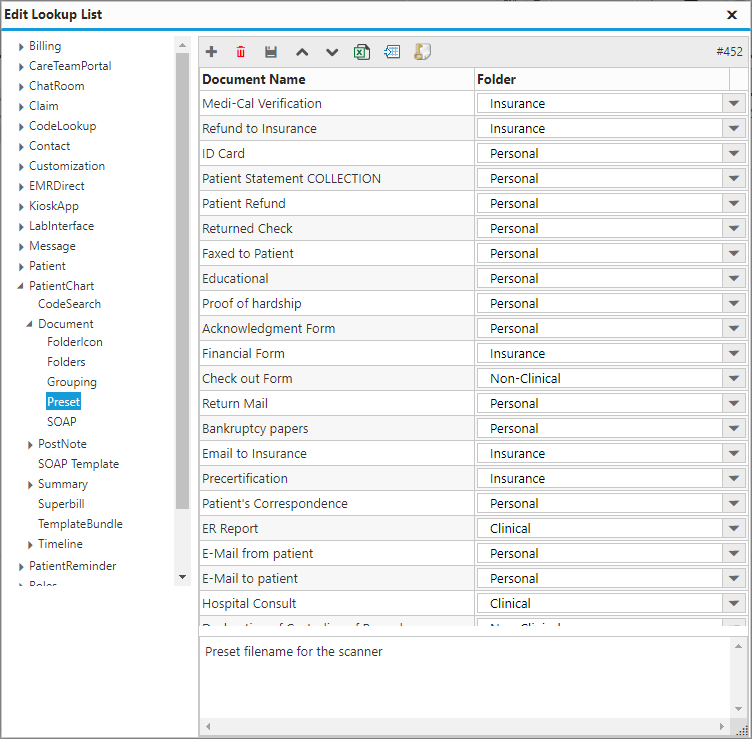
- Document Name: enter the name of the document to be sorted
- Folder: selects the folder in which to save the sorted documents
Configure Template Sorting
- Click Settings > System Configurations > expand PatientChart > expand Document > click Grouping
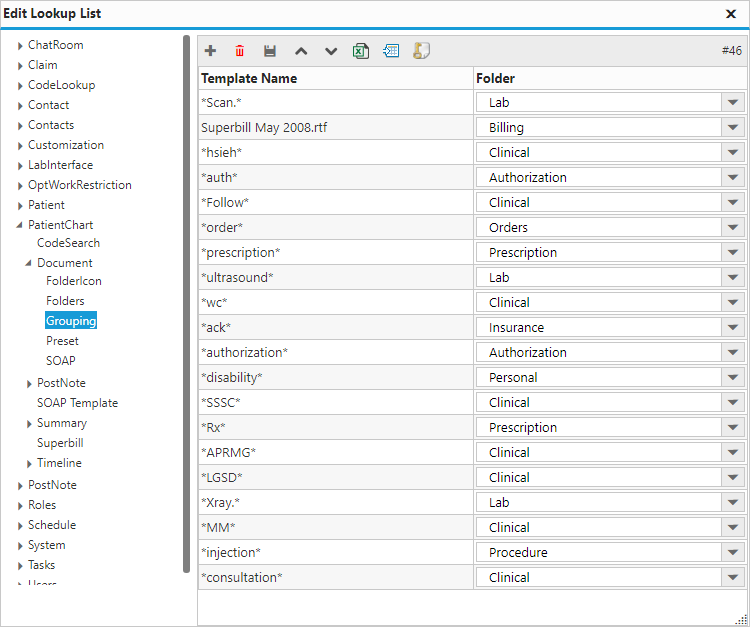
- Template Name: enter the key pattern, word or phrase to sort the templates against
- Folder: selects the folder in which to save the sorted templates
Notes:
The system will search for user specified keys and move templates matching that key to the specified folder. The key must be set between two asterisks (e.g. *key-word*).
- Key Pattern: some set of letters or numbers
- Key Word: some word
- Key Phrase: some set of words
Configure Chart Summary Sections
- Click Settings > System Configurations > expand Customization > expand Summary > click Sections
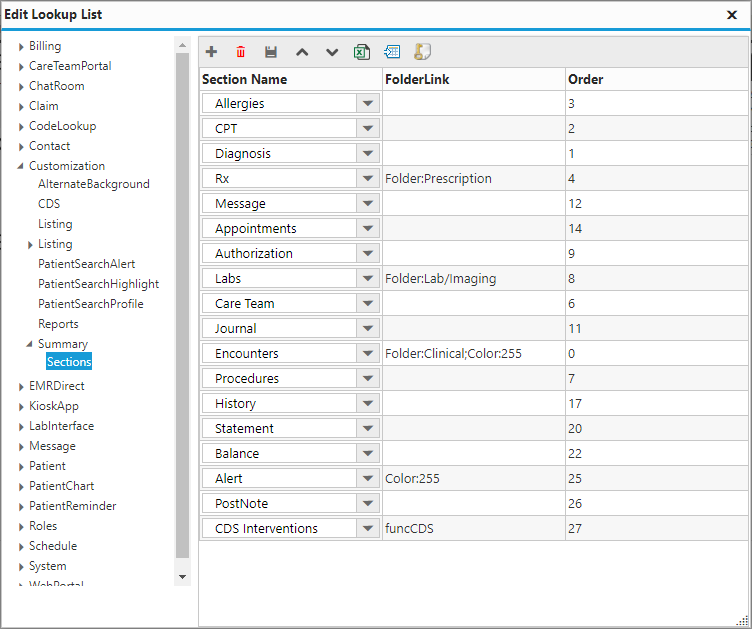
- Section Name: selects the section in which to include in the patient summary
- Order: enter the sequence with which to sort the folders
Configure Summary Template Panel
- Click Settings > System Configurations > expand PatientChart > expand Summary> click Templates
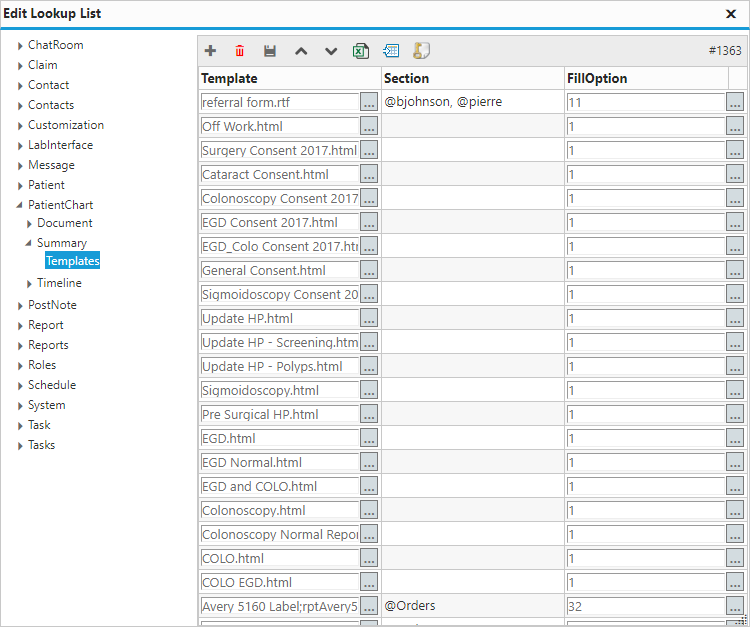
- Template: selects the template to include in the patient summary
- Section: selects the section in which to include the template
- FillOption: selects the default behavior of the template (see picture)
Configure Timeline Tabs
- Click Settings > System Configurations > expand PatientChart > expand Timeline > click Tabs
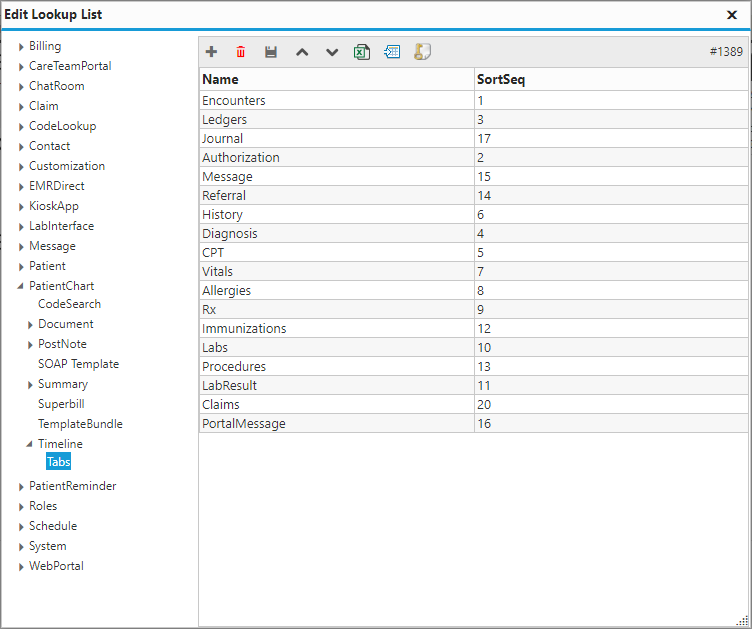
- Name: enter the name of the patient timeline tab
- SortSeq: enter the sequence with which to sort the folders
Configure PostNote Options
- Click Settings > System Configurations > expand PatientChart > expand PostNote > click Listing
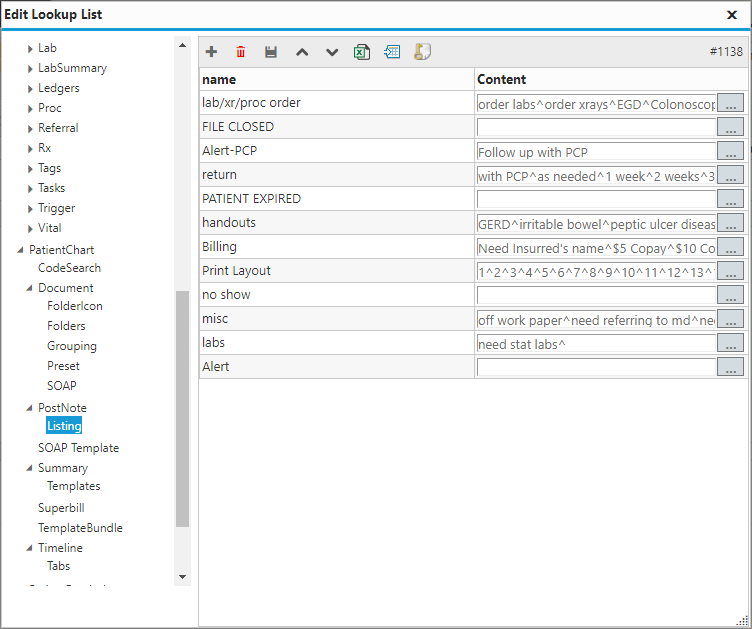
- Name: enter the name of the PostNote
- Content: enter the options for each PostNote section