Templates
Templates
Add a header to begin generating the table of contents
Create New Template
- Click Templates
- Click the folder icon above the correct directory > click New Template
- Enter the new template’s name
- Find Choose Template Type > select the correct template type (e.g. SOAP, HTML Form, etc.) (see reference)
- Click Create
Edit / Format Template
- Click Templates
- Click an existing template
- Use the text editor’s functions to edit and format the template (see reference)
- Click Save when finished
Tip:
- Hover over each of the text editors buttons to see its function
Add Template Macros
- Click Templates
- Click an existing template
- Click the + next to each section of the macro toolbox (e.g. Design Toolbox, Form Toolbox, Patient Data, etc.) (see reference)
- Click the desired function to insert it into the template
- Click Save when finished
Test Template
- Click Save
- Find Test Template > check the box > click the patient’s name hyperlink to choose another patient
- Enter the desired patient’s name, date-of-birth or account number > click Search Patient > double-click the correct patient
- Click Fill to test the template with that patient’s data
- Uncheck Test Template box to continue editing the template
Add Stamps
- Click the clinic’s name at the top of the screen > click Stamps
- Click the + button to add space for a new stamp > under Stamp Name enter the stamp’s name
- Under Stamp Text enter the text to stamp
- Or click the … > click Choose File to select the stamp file > click Upload
- Or do both A and B to add a stamp with both text and an image
- Click Ok to save and exit
Reference Guide
Add a header to begin generating the table of contents
Navigation Menu
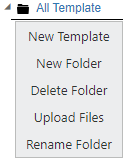
- New Template: opens new template window
- New Folder: creates new folder
- Delete Folder: deletes the selected folder
- Upload Files: opens file browser to select which files to upload
- Rename Folder: renames the selected folder
New Template Panel
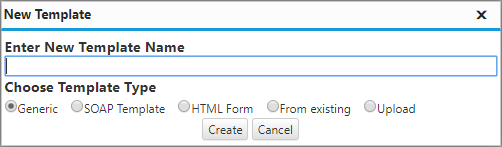
- Template Name: enter template name
- Template Type:
- Generic: creates a blank template
- SOAP: creates a template with configurable SOAP sections (see configuration)
- HTML Form: create forms for patients to fill online or via the facility’s registration tablet(s)
- From existing: creates a copy of an existing template
- Upload: uploads a template file
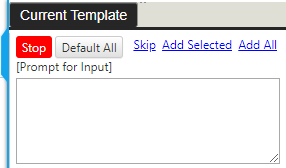
Test Template Option
![]()
- Checkbox: enables test filling of the template
- Name Link: displays which patient’s data will be used to fill the template
- Fill: begins filling the template
Text Editor Toolbar

- Format: selects the format of the text
- Font: selects the font of the text
- Font Size: selects the size of the text
- Select Color: selects the color of the text
- Background Color: selects the highlight color of the text
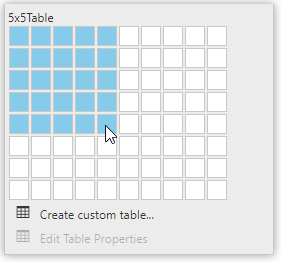
- Insert Table: inserts a table
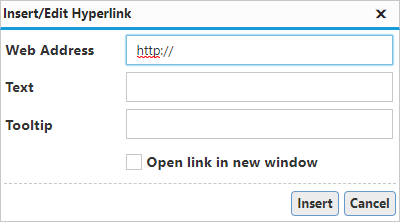
- Hyperlink: inserts a hyperlink
- Search: opens “Find and Replace” window
- Return: inserts new line
- Border Style: cycles through various border styles
- Editor: opens advanced editor
- Image: inserts image
- Page Break: inserts page break (used for printing templates)
Macro Toolbox

- Design Toolbox: contains tools used for
- Add Checkbox: inserts checkbox
- Add Date Selection: inserts calendar for selecting the date
- Prompt for Input: prompts user to type an input (see picture)
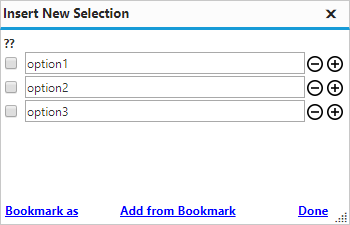
- Add Pick List: prompts user to select from a list of user-defined options (see picture)
- Bookmark as: saves options for reuse
- Add from Bookmark: add options from bookmarks
- Bookmark Current Selected Text: creates a bookmark from highlighted text
- Add Bookmarked Text: adds previously bookmarked text
- Form Toolbox: contains macros for creating forms for patients to fill online or via the facility’s registration tablet(s)
- Patient Data: contains patient data macros
- Contact Data: contains contact data macros
- Clinical Data: contains encounter data macros
- System Data: contains system data macros
- SOAP: inserts user-defined SOAP sections
Advanced Configuration
Add a header to begin generating the table of contents
Configure SOAP Sections
- Click Settings > System Configurations > expand PatientChart > click SOAP Template
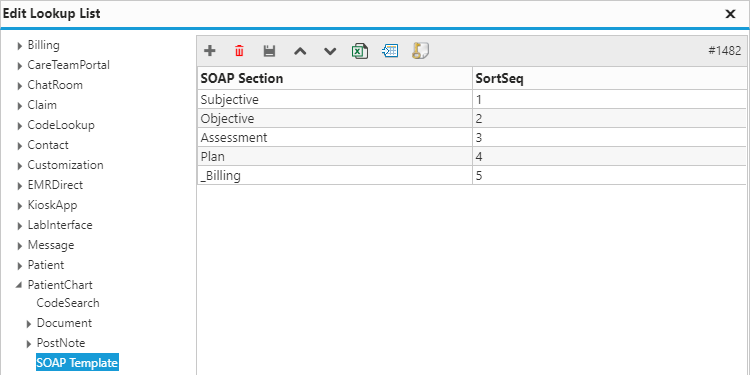
- SOAP Section: enter the name of the SOAP section
- SortSeq: enter the sequence with which to sort the sections
Configure Chart Template Panel
- Click Settings > System Configurations > expand PatientChart > expand Summary > click Templates
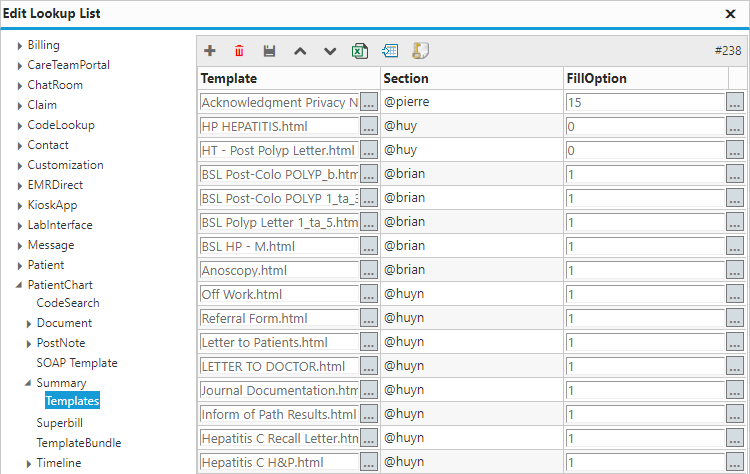
- Template: selects which template to include in the patient chart
- Section: selects within which tab to include the template
- FillOption: selects the default behavior of the template when opened
- Automatically start filling: automatically begins filling the template when opened
- Automatically fill with default: automatically fills the template with the default selection for each macro when opened
- Print after finish: automatically prints the template after it is filled
- Automatically save note after finish: automatically saves the template after it is filled
- Automatically exit after finish: automatically closes the template after it is filled