Schedule
Appointments
Add a header to begin generating the table of contents
Other Sections
Add a header to begin generating the table of contents
The Schedule section is for users to create, edit, or delete appointments for all patients within the database. Users can also perform different functions such as customizing the schedule view, or directly accessing a patient’s chart and notes.
Schedule Tab Location
Click on the Schedule tab from the left side panel to see an overview of all physicians’ schedule

Create Appointment
- Double-click a free time slot
- Or right-click a free time slot > click the New Appointment option
- Or click a free time slot to select it > click the New Appointment button

- Click Patient Lookup (see reference)

- Enter the patient’s name, date-of-birth or account number > click Search Patient > double-click the correct patient
- Or click New Patient to create a new patient
- Select the correct Schedule, Subject, and Reason, etc. (see configuration)
- Click Save and Close
Copy/Cut and Paste Appointment
- Right-click an existing appointment > click the Cut / Copy Appointment option
- Right-click a free time slot > click the Paste option
- Click Save and Close
Expand Appointment
- Double-click an existing appointment > select the correct Duration (see configuration)

- Or hover over the top or bottom border of an existing appointment > click and drag

- Or hover over the top or bottom border of an existing appointment > click and drag
- Click Save and Close
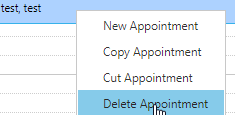
Delete Appointment
- Click an existing appointment to select it > click the Delete Appointment button

-
- Or right-click an existing appointment > click the Delete Appointment option
- Or right-click an existing appointment > click the Delete Appointment option
- Confirm
Create Recurring Appointment
- Create an appointment > check the Recurrence box > configure the recurring appointment with the additional options

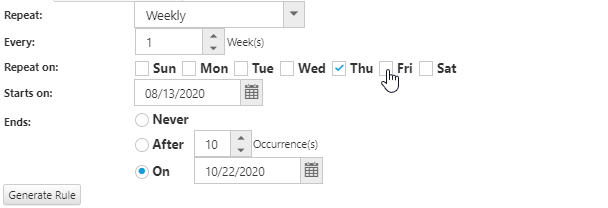
- Click Save and Close
Create Overbook Appointment
- Double-click the free space to the right of an existing appointment
- Or click an existing appointment to select it > click the New Appointment button
- Select the correct Schedule, Subject, and Reason, etc. (see configuration)
- Click Save and Close
Change Status of Appointment
- Click an existing appointment to select it > select the correct Status from the Patient Preview
- Or double-click an existing appointment
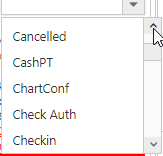
- Select the correct Status option (see configuration)

- Click Save and Close
Schedule View
Add a header to begin generating the table of contents
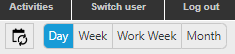
Change Schedule View (e.g. day, week, month)
- Click the desired schedule view from the Day, Week, Work Week, Month buttons
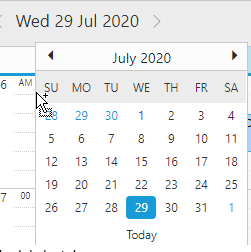
View Schedule by Date
- Click the date > use the calendar to select the desired date
View Schedule by Tabs
- Above the patient preview, click the desired tab (see configuration)
Change Schedule Group
- At the top of the screen, select the desired schedule group (see configuration)
Filter Reoccurring Appointments
- Click the Filter Recurrent button to only view recurring appointments
Print Schedule
- Click the Print Schedule button

- Click the Print button in the browsers print window
Quick Preview
Add a header to begin generating the table of contents
Location
From the Schedule tab, users can get a quick glimpse at the patient’s information without opening up the appointment or profile itself.
- Click the appointment ONCE > navigate to the left side under Patients and Appointments > browse through the patient’s info
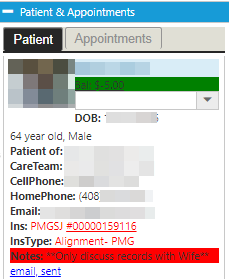
- Here you can see at a quick glance important info which correlates to everything in their Patient Profile
- By selecting the drop down menu, users can also change the status of the patient: alert, check in, check out, etc.
- Any specific notes, past due balance, credit, or amount due are highlighted in red making it easy for users to be alerted
Waiting Room
At a clinic’s discretion, we can add a Waiting Room section which lists out patient’s whos status needs to be updated.
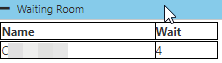
- Expand Waiting Room by clicking the tab ONCE
- Click the REFRESH icon to see an updated wait count based on the patients appointments
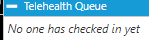
Telehealth
- Similar to Waiting Room, simply click the Telehealth Que to expand any upcoming Telehealth appointments
- If there are no Telehealth appointments scheduled, then it will show the following
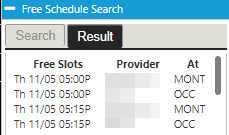
Free Schedule Search
If a clinic wants, they can have the ability to quickly search any availability for an open slot for patients
- Click Free Schedule Search to expand window

- Users can check based on availability of facility, providers, preference by simply clicking the specific check box
- Once selected criteria is met > click Start Search > click Results tab to browse through filtered results
Reference Guide
Add a header to begin generating the table of contents
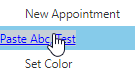
Schedule Menu
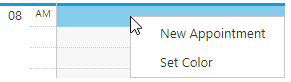
- New Appointment: opens the new appointment window
- Set Color: opens the ColorCoding system configuration window (see configuration)
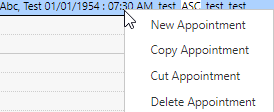
Appointment Menu
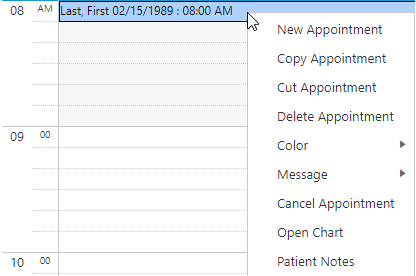
- New Appointment: opens the new appointment window
- Copy Appointment: copies the selected appointment
- Cut Appointment: cuts the selected appointment
- Delete Appointment: deletes the selected appointment
- Postpone: moves the selected appointment to the end of the schedule
- Message: selects the type of message to send
- Color:
- Set Color: opens the ColorCoding system configuration window (see configuration)
- Match Color: displays a message with the color match details
- Open Chart: opens the relevant patient’s chart
- Patient Notes: opens the relevant patient’s notes
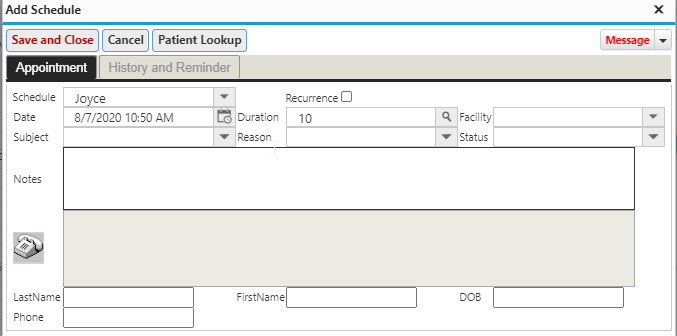
Appointment Window
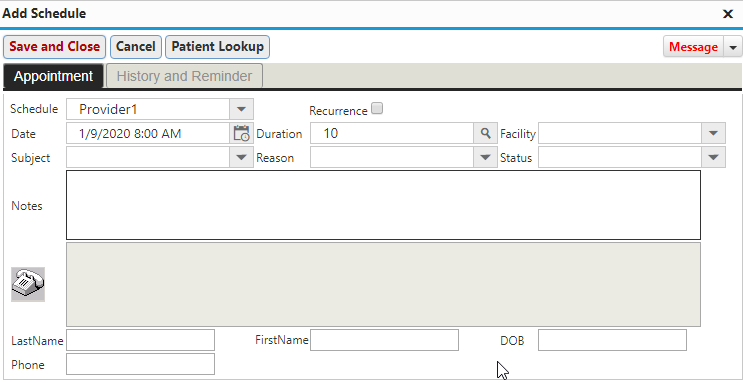
- Save and Close: saves current entries, selections and changes
- Cancel: cancels current entries and selections
- Patient Lookup: searches for correct patient from a list of existing patients (see reference)
- Schedule: shows the provider for the appointment
- Date: shows the date and time of the appointment
- Subject: selects the subject of the appointment
- Duration: selects the duration of the appointment
- Reason: selects the reason for the appointment
- Facility: selects the facility appointment will be at
- Status: selects the status of the appointment
- Recurrence Box: expands options for recurring appointments
- Notes: enter notes about the appointment
- Last Name, First Name, DOB, Phone: auto-fills with patient demographics after selecting a patient
Add Schedule Window
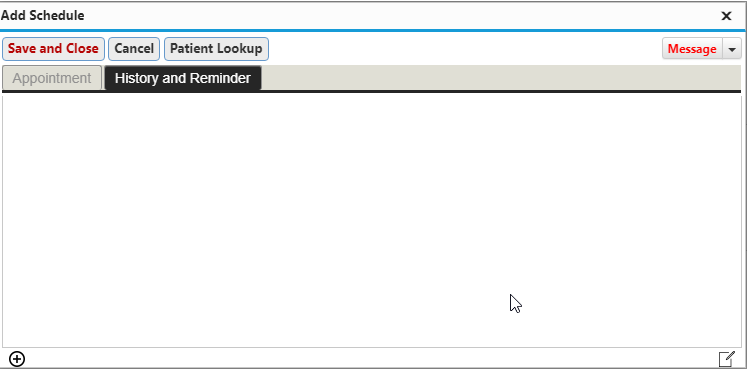
- History and Reminder: shows the history of the appointment
- Message – Patient: emails the patient information or a reminder prior to the appointment
- Message – SMS Patient: texts the patient information or a reminder prior to the appointment
- Message – TeleHealth: emails the patient a link to join the TeleHealth appointment
Patient Lookup

- Search Box: enter a patient’s name, date-of-birth, or account number to search for them
- Clear: clears the search box
- New Patient: opens the new patient window
- Cancel: cancels the current entries and selections