Messaging & Tasks
Messages
Add a header to begin generating the table of contents
Other Sections
Add a header to begin generating the table of contents
The Messages section refers to messages that are sent internally between staff. With a similar interface to a typical email, users can navigate through different folders and icons to perform certain tasks. Messages can be easily sent to different folders or staff based on each category setup.
Message Tab Location
Click Messages tab from the left side panel to access your messages/tasks
- Bold items are unread
- Folder operations: Click the folder icon to perform functions
- New Folder: creates new folder > enter new name
- Rename Folder: renames current selected folder
-
Delete Folder: deletes current selected folder
Preview/ Open a Message
- Click specific message for a quick preview of said message towards the bottom of the screen
- Click arrow on the left of folders icon to expand different categories: inbox, todo, sent, etc.
Work on Tasks in Bulk via Quick Navigation
- Select the first message with attachment via paper clip link to navigate straight into patient’s charts
- Notice tool bar on bottom of patient notes
- Click drop down to reply or forward
- Delete attachment pressing trash can icon
- Move attachment by pressing folder drop down icon
- Move attachment by pressing folder drop down icon
- Navigate to the next or previous message and attachments from same screen by selecting < > arrows
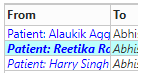
Sort Messages
- Click a column heading (e.g. From, To, Subject, etc.) to sort by it

- Or click the same column heading again to reverse it
- Click the Clear button to reset it

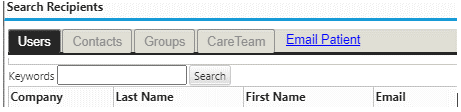
Search Messages
- Enter the search criteria in the search box (reference, Acct, DOB, Subject)
- Or click a column heading (e.g. From, To, Subject, etc.) to search by it
- Click Search Message
Compose a Message
- Click New Message icon from the tool bar to compose a new message
- Compose from here only allows generic message without link to any patient chart or attachment, because you are not in any patient chart.
- Fill out all the necessary information on the pop up window > Send
Reply to a Message
- Click the Reply button > compose a message > click Send

Forward a Message
- Click the correct message to preview it
- Click the Forward button > enter the recipient(s) > click Send

Delete a Message
- Click the Delete button to delete correct message

Mark a Message as Unread
- Click the Unread button to revert message to unread

Print Message List
- Click the Print button to print it

Send an Attachment
- Click New Message
- Compose a message > click Relates To link > find the correct patient based on: name, DOB, acct# (see reference) > double click patient
- Click Attachments > select the correct patient note(s) > click Ok
- Click Send icon when finished
Open an Attachment
- Select the message with attachment icon to preview
- Find Attachment(s)à click the adjacent hyperlink

(Optional/Advanced) Journal a Message
- Click Messages
- Click Inbox > click the correct message to select it
- Click the Journal button to move it to the patient summary, under the Journal section
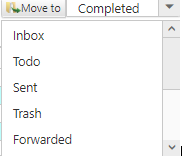
Move a Message
- Select the destination folder from the drop-down (inbox, todo, sent, etc.) > click Move to
Reassign Message
If you are on vacation, you can reassign your messages to another staff to handle.
- Preview message > select Reassign icon
- Click correct staff member or type in search bar > click ok
- Reassigning multiple messages
- Click one document
- Hold shift button > click down however many files you’d like to highlight > Reassign button

(Optional/Advanced) Chart
- Users can jump straight to a patient’s chart from message screen
- Check reference tab to make sure it corresponds to correct patient or search in tool bar
- Click chart icon
- Or click the patient’s name hyperlink
Reference Guide
Add a header to begin generating the table of contents
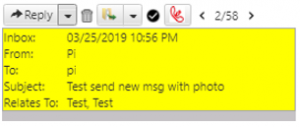
Inbox Section
![]()
- From: displays sender
- To: displays the recipient(s)
- Subject: displays the subject of the message
- Received: displays when the message was received
- Reference: hyperlink to relevant patient’s chart
- Due: displays when the due date of the task
- Paper Clip: shows whether the message contains an attachment
- Read Date: displays when the message was read
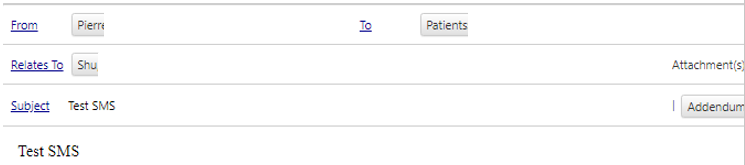
Message Window
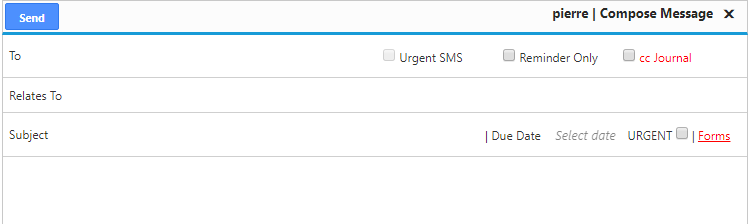
- To: enter to whom the message will be sent
- Relates To: enter to which patient the message relates
- Subject: enter the subject of the message
- Attachments: selects which patient notes to attach to the message
- cc Journal: adds this message to the patient’s Journal
- Forms: selects which forms to attach to the message
Messages Toolbar
![]()
- New Message: creates a new message
- Refresh: refreshes the Inbox with the most recent messages
- Delete: deletes the selected message
- Unread: marks the selected message as unread
- Print: prints the selected message
- Chart: opens the related patient’s chart of the selected message
- Forward: forwards the selected message
- Reply: replies to the selected message
- Journal: moves the selected message to the patient’s Journal
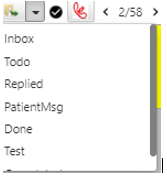
- All: toggles between showing “All” messages, or only messages from either patients or the care team

- Move to: selects a folder to move the selected message
- Filter: filters messages according to the user’s selections