Lab Order
Lab Order
Add a header to begin generating the table of contents
eLab order is meant for the correct authorized personnel to create lab tests for patients. The test name, diagnosis name, and codes all differ from each provider, but we all work collectively to ensure a smooth process for all parties involved.
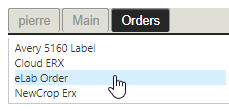
Lab Order Location
Click on elab Order underneath the Orders tab located on the right side of the patient’s summary screen
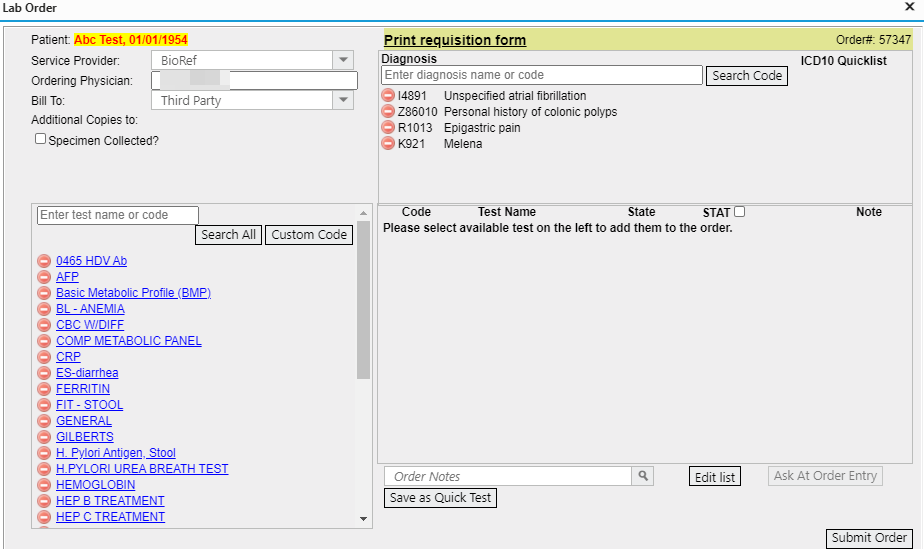
Open Lab Order
- There must be an encounter entry before you can place a lab order, so that we know which provider to use.
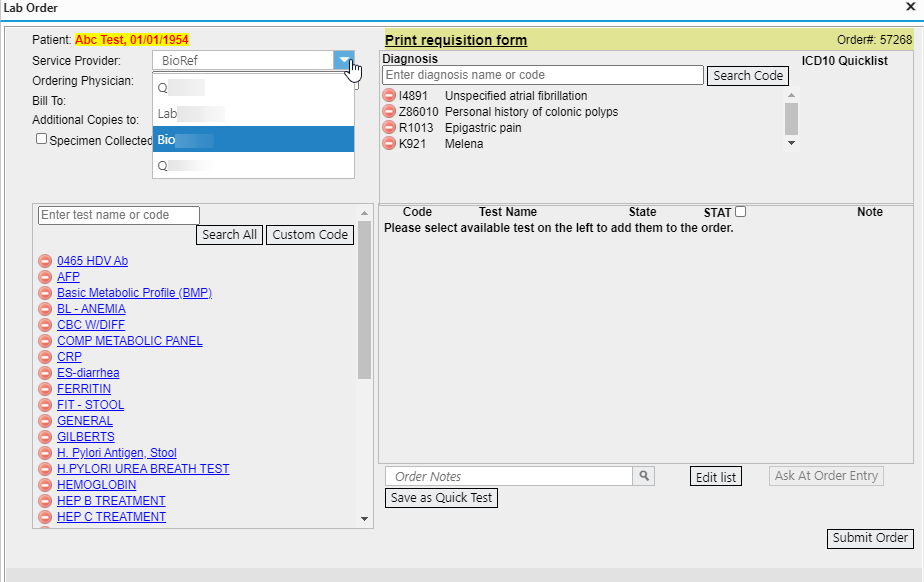
- Service provider: This is the lab to be order from
- Each lab will have different criteria for codes, test panes, etc…
- Each lab will have different criteria for codes, test panes, etc…
- Bill to: provides different options for the lab to bill for this order
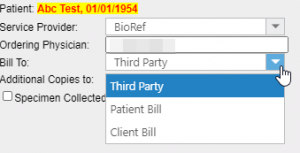
- Third party (default): bills directly to the insurance that the clinic has on file, the billing information will be attached to the lab order
- Patient bill: bills directly to the patient (i.e. cash patient)
- Client bill: bills directly to the clinic account instead
Enter Test Name
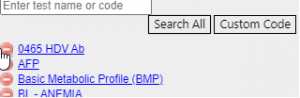
- Enter name or code in the search box
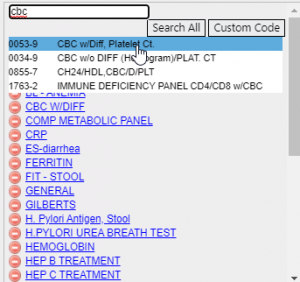
- Notice that by typing in key letters or numbers, all options associated with the criteria will automatically pop up
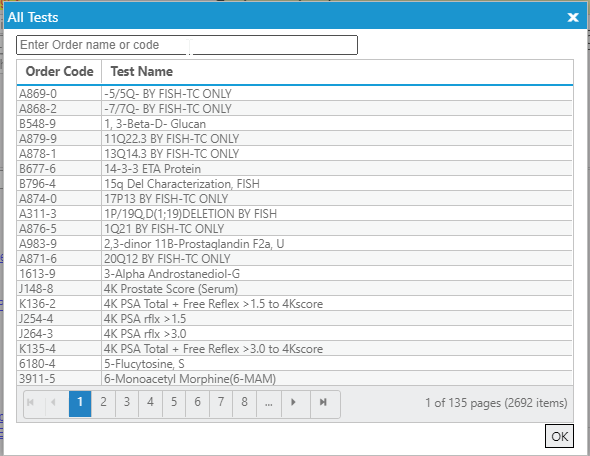
- Or click SEARCH ALL icon for a separate window for selection
- Note that each clinic will have different options and format
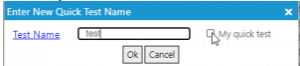
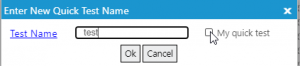
- To create commonly use test panel, enter all the necessary tests, then click on Save as quick test , enter the name of the panel

- To delete a test, click the red subtract icon adjacent to the name of the test or code
- To modify a panel, create or update the list of tests and save to the same panel name
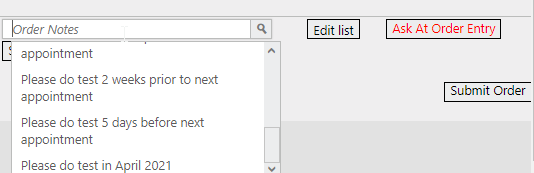
- There are 2 separate notes that can be edited in the lab order screen
-
- For each test, type the note in the empty box next to the test test

- Or type in ORDER NOTES which refers to the entire test
- For each test, type the note in the empty box next to the test test
-
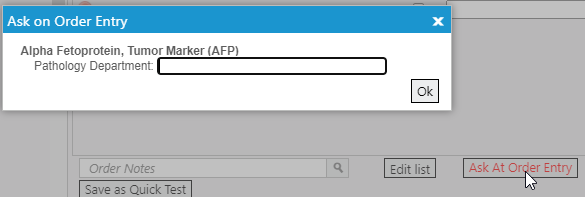
- Some test has questions that must be answer (Ask at order entry): it will show red if it is required for that test
- Save as quick text: allows users to add a full list of tests to be saved and inserted quickly
- Search/add tests to the right hand side > delete tests if needed
- Select specific tests > Click Save as Quick Test icon > type unique identifier > click OK
- Double check everything is accurate > click Submit Order icon
Enter Diagnosis
- The current patient diagnosis will automatically carried over to the lab order.
- You can add to it by enter name or code in the search box
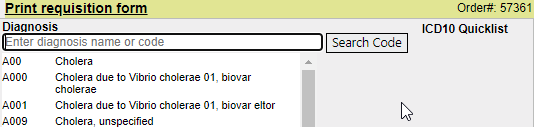
- Notice that by typing in key letters or numbers, all options associated with the criteria will automatically pop up
Finish
- Double check everything is accurate > click Submit Order icon, it will be transmitted to the lab
- A copy of the test requisition will be in the patient chart note
- You can print the requisition and hand it to the patient to use at the lab draw station