Extensions
Appointments
Add a header to begin generating the table of contents
Other Sections
Add a header to begin generating the table of contents
Webcam Capture
change
Dictation Services
change
USPS Address Lookup
change
eFax
change
Scanning
- Exit any scanner dialog on your screen
- Launch NAPS2 from your desktop instead of the scanner dialog.

- Launch Cloud EMR
- Open any chart, you will see a scanner toolbar
- Open any chart, you will see a scanner toolbar

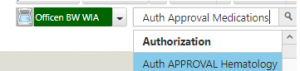
- Dropdown and select a file name.
- Click the scanner button
- Scan. It will be in the patient chart
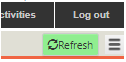
- If you don’t see the scanning toolbar, make sure that the NAPS2 is launched, then click on the refresh icon in the patient chart
- Dropdown and select a file name.
ePrescribing
change
Patient Portal
change
Lab Orders
change
Appointment Reminder
change
Schedule View
Add a header to begin generating the table of contents
1
change
2
change
3
change
Reference Guide
Add a header to begin generating the table of contents
4
change
5
change
6
change