Contacts
Contacts
Add a header to begin generating the table of contents
Create New Contact
- Click Contacts
- Click the Plus button to open the “Edit Contact” window > fill out the Info, Credential and Billing tabs
- Click Save and Close
Open / Edit Existing Contact
- Click Contacts
- Double-click the correct contact to open it
Sort Contacts
- Click Contacts
- Click a column heading (e.g. Company, Code, Last Name, First Name, etc.) to sort by it
- Or click the same column heading again to reverse it
- Click the Clear button to reset it
Search Contacts
- Click Contacts
- Enter search criteria in the search box
- Or click a column heading (e.g. Company Code, Last Name, First Name, etc.) to search by it
- Or select criteria from the Filter By menu > enter value to filter by
- Click the Search Contact button
- Click the Clear button to reset it
Reference Guide
Add a header to begin generating the table of contents
Edit Contact Window
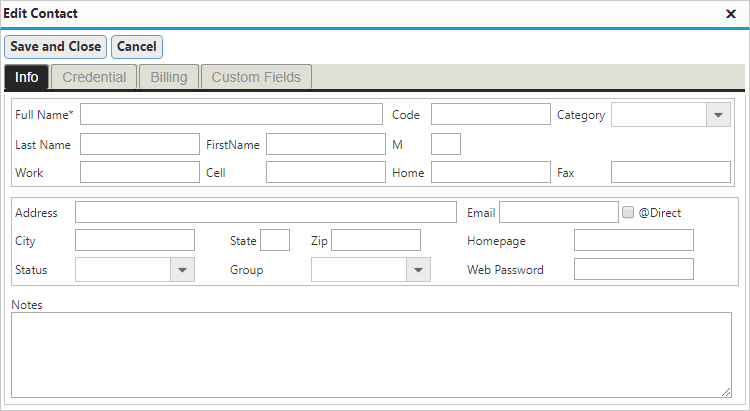
- Full Name: enter the contact’s name
- Category: select the contact’s category (e.g. User, Primary / Referring MD, Pharmacy, etc.)
- M: enter the contact’s mobile phone number
- Status: select whether the contact is active or not
- Notes: enter notes relevant to the contact’s information
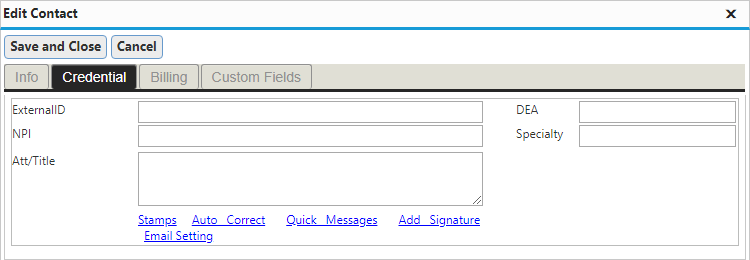
- Stamps: upload stamp files to be associated with the contact
- Auto Correct: enter auto-correct rules
- Quick Message: enter quick message rules
- Add Signature: add ePad signature or upload signature files to be associated with the contact
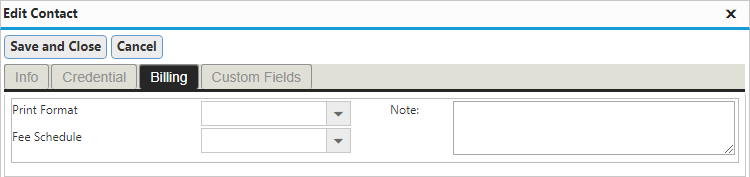
- Notes: enter notes relevant to the contact’s billing information
Contacts Toolbar

- Search Box: enter a patient’s name, DOB, or account number to search for them
- Filter By: select the criteria to filter contact’s by (i.e. Zip, City, State, Group)
- Clear: clears the search contact
- Print: enter a patient’s name, DOB, or account number to search for them
- Tabs: view contacts by category
Advanced Configuration
Add a header to begin generating the table of contents
Configure Categories
- Click Settings > click System Configurations > expand Contact > click Category
- Click the + button to add an entry > enter the Contact Category and Data Type

- Contact Category: the name of the contact category
Configure Custom Fields
- Click Settings > click System Configurations > expand Contact > click Custom Fields
- Click the + button to add an entry > enter the Field Name
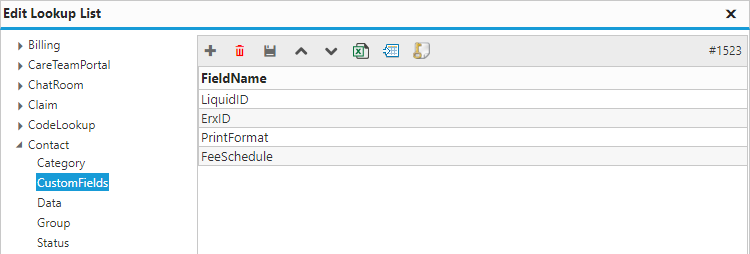
- Field Name: the name of the custom field
Configure Groups
- Click Settings > click System Configurations > expand Contact > click Group
- Click the + button to add an entry > enter the Contact Group and Data Type
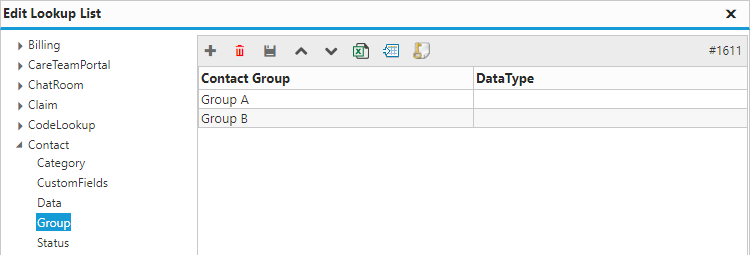
- Contact Group: the name of the contact group
Configure Status
- Click Settings > click System Configurations > expand Contact > click Group
- Click the + button to add an entry > enter the Contact Status and Data Type

- Contact Status: the name of the contact status