Contacts
Appointments
Add a header to begin generating the table of contents
Other Sections
Add a header to begin generating the table of contents
The Contacts section is made up of all the contacts within the data base of your clinic. Here you can search by the name of the company, code, or phone number. Additionally, users can filter based on Employers, Guarantors, Pharmacies, Users, etc.
Contact Location
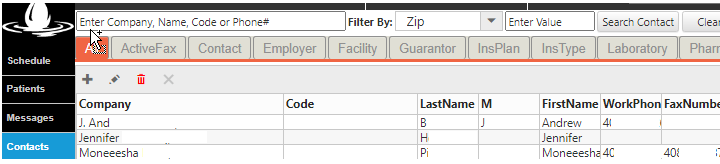
Click the contacts tab from the left side panel to browse all contacts within the clinic’s software
Search Contacts
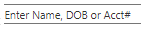
- Enter search criteria in the search box
- Or click a column heading (e.g. Company Code, Last Name, First Name, etc.) to search by it
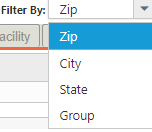
- Or select criteria from the Filter By menu > enter value to filter selecting”: zip, city, state, group
- Click the Search Contact button
- Click the Clear button to reset it

Sort Contact
- Browse through the multiple tabs to select the correct category

- Click a column heading from the toolbar (e.g. Company, Code, Last Name, First Name, etc.) to sort by it

- To reverse, click the same column or press the Clear icon to reset it
Create New Contact
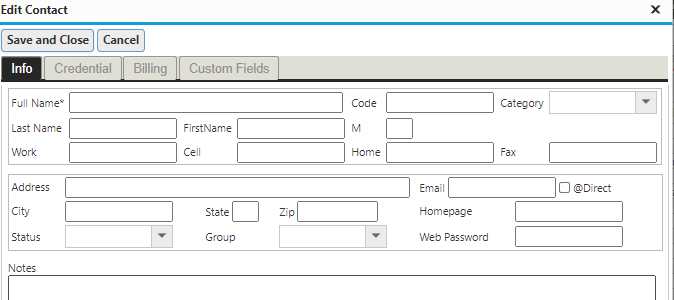
- Click the + icon to open up the “Edit Contact” window

- Fill out the info, credential, and billing tabs and other necessary info > click Save and Close icon icon to proceed
Open/Edit Existing Contact
- Double click the correct contact to open the Edit Contact window
- (Optional/Advance) Click on desired field to be edited and tab selection: Info, Credential, Billing, Association, Others, Custom Fields
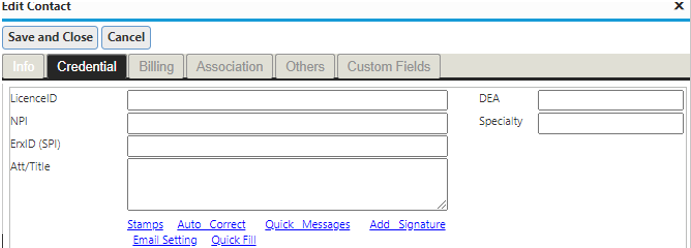
- Credential (for provider, practice and facility), enter as needed
- Personalization
-
- Stamps: click hyperlink to allow users to setup stamp name and text
- Auto correct: click hyperlink to allow users to replace a certain word with another phrase
- Quick messages: click hyperlink to setup shortcuts users to send messages between staff quickly
- Add signature: click hyperlink to allow users to create or upload signature for stamping
- Quick fill: click hyperlink to allow users to change the name and paragraph
-
- (Optional) Billing
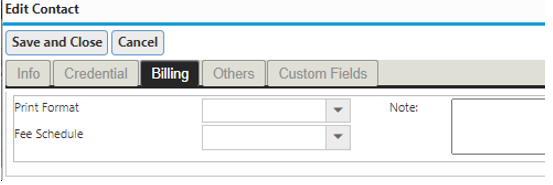
- Select the drop down to choose different Print Format or Fee Schedule
- Enter notes if necessary
- (Optional) Custom fields
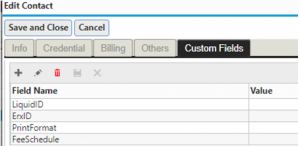
- Click the tool bar to add, edit, delete your field name
- Credential (for provider, practice and facility), enter as needed
(Optional/Advanced) Exporting to a Spreadsheet
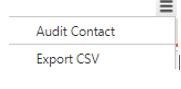
- Click the square button icon on the top right corner
- Select from the drop down menu: Audit Contact or Export CSV
Reference Guide
Add a header to begin generating the table of contents
Edit Contact Window
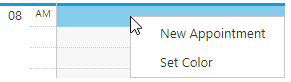
- New Appointment: opens the new appointment window
- Set Color: opens the ColorCoding system configuration window (see configuration)
Contacts Toolbar
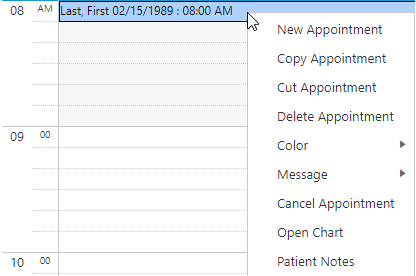
- New Appointment: opens the new appointment window
- Copy Appointment: copies the selected appointment
- Cut Appointment: cuts the selected appointment
- Delete Appointment: deletes the selected appointment
- Postpone: moves the selected appointment to the end of the schedule
- Message: selects the type of message to send
- Color:
- Set Color: opens the ColorCoding system configuration window (see configuration)
- Match Color: displays a message with the color match details
- Open Chart: opens the relevant patient’s chart
- Patient Notes: opens the relevant patient’s notes