Cloud EMR Claim Printing Adjustment
Printing
Add a header to begin generating the table of contents
The alignment of the claim form highly dependents on the printer in use. Each printer model has a different left and top margin making it very difficult to have a uniform claim output. This guide will show you how to adjust your claim format for paper claims to properly align to your printer.
Backup the Claim Format
- Navigate to the top right corner of the software
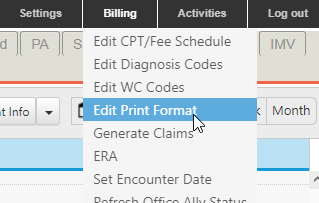
- Click on Billing > Edit Print format > select the paper claim.

- Select the NPI Paper

- Click Export > save the file in case you make a mistake and would like to restore the format
Adjust the Margin
- Place claim form into your printer > select the paper claim format > click Print Guide Grid > send it to your printer
- Review > edit the left margin and repeat until the left most column is where you want it to be

Identify Corrections
- Open a claim > print it out > circle any fields that need adjustment
Make Adjustments
- Click on Billing > Edit Print format > Select NPI Paper
- On the bottom panel, select the row that corresponds to the field that needs adjustment. Look at the note column for the box # location and FieldItem for the field content. Edit that row
- Look at the guide output from (Adjust the margin step #1) > find the row# and the column# of that field
- Enter the new row# or column# in the grid, don’t make any other change
- Save that row
- Repeat #2
- Print a claim and continue with adjustment from (Adjust the margin step #1)
Restore the Format
In case you want to revert back to the old format and start there, follow these steps:
- Select NPI Paper
- Click Import > select the saved file from (Backup the Claim Format step #4), most likely it is in your download folder
Adding Another Claim Printer
Always try to print this claim at the new printer. If it is so far out of alignment, use this step to create a new claim format for that printer.
- Export the NPI paper claim format using (Backup the Claim Format step #4) above
- On the top panel, insert a new row > enter the form name with unique identifier i.e. the new printer name > save that row with just that name
- Select that row again > click import and load the exported file
- Repeat the alignment process from (Adjust the margin steps)
- Whenever you print the claim, select this format for that printer
